


Dragon Quest 3 Remake: Zoma\'s Citadel Walkthrough
Conquer Zoma's Citadel in Dragon Quest 3 Remake: A Comprehensive Guide
This guide provides a complete walkthrough of Zoma's Citadel in Dragon Quest 3 Remake, the game's climactic final dungeon. It details the route, treasure locations, and strategies for defeating each boss encounter, culminating in the showdown with Zoma himself.
Reaching Zoma's Citadel
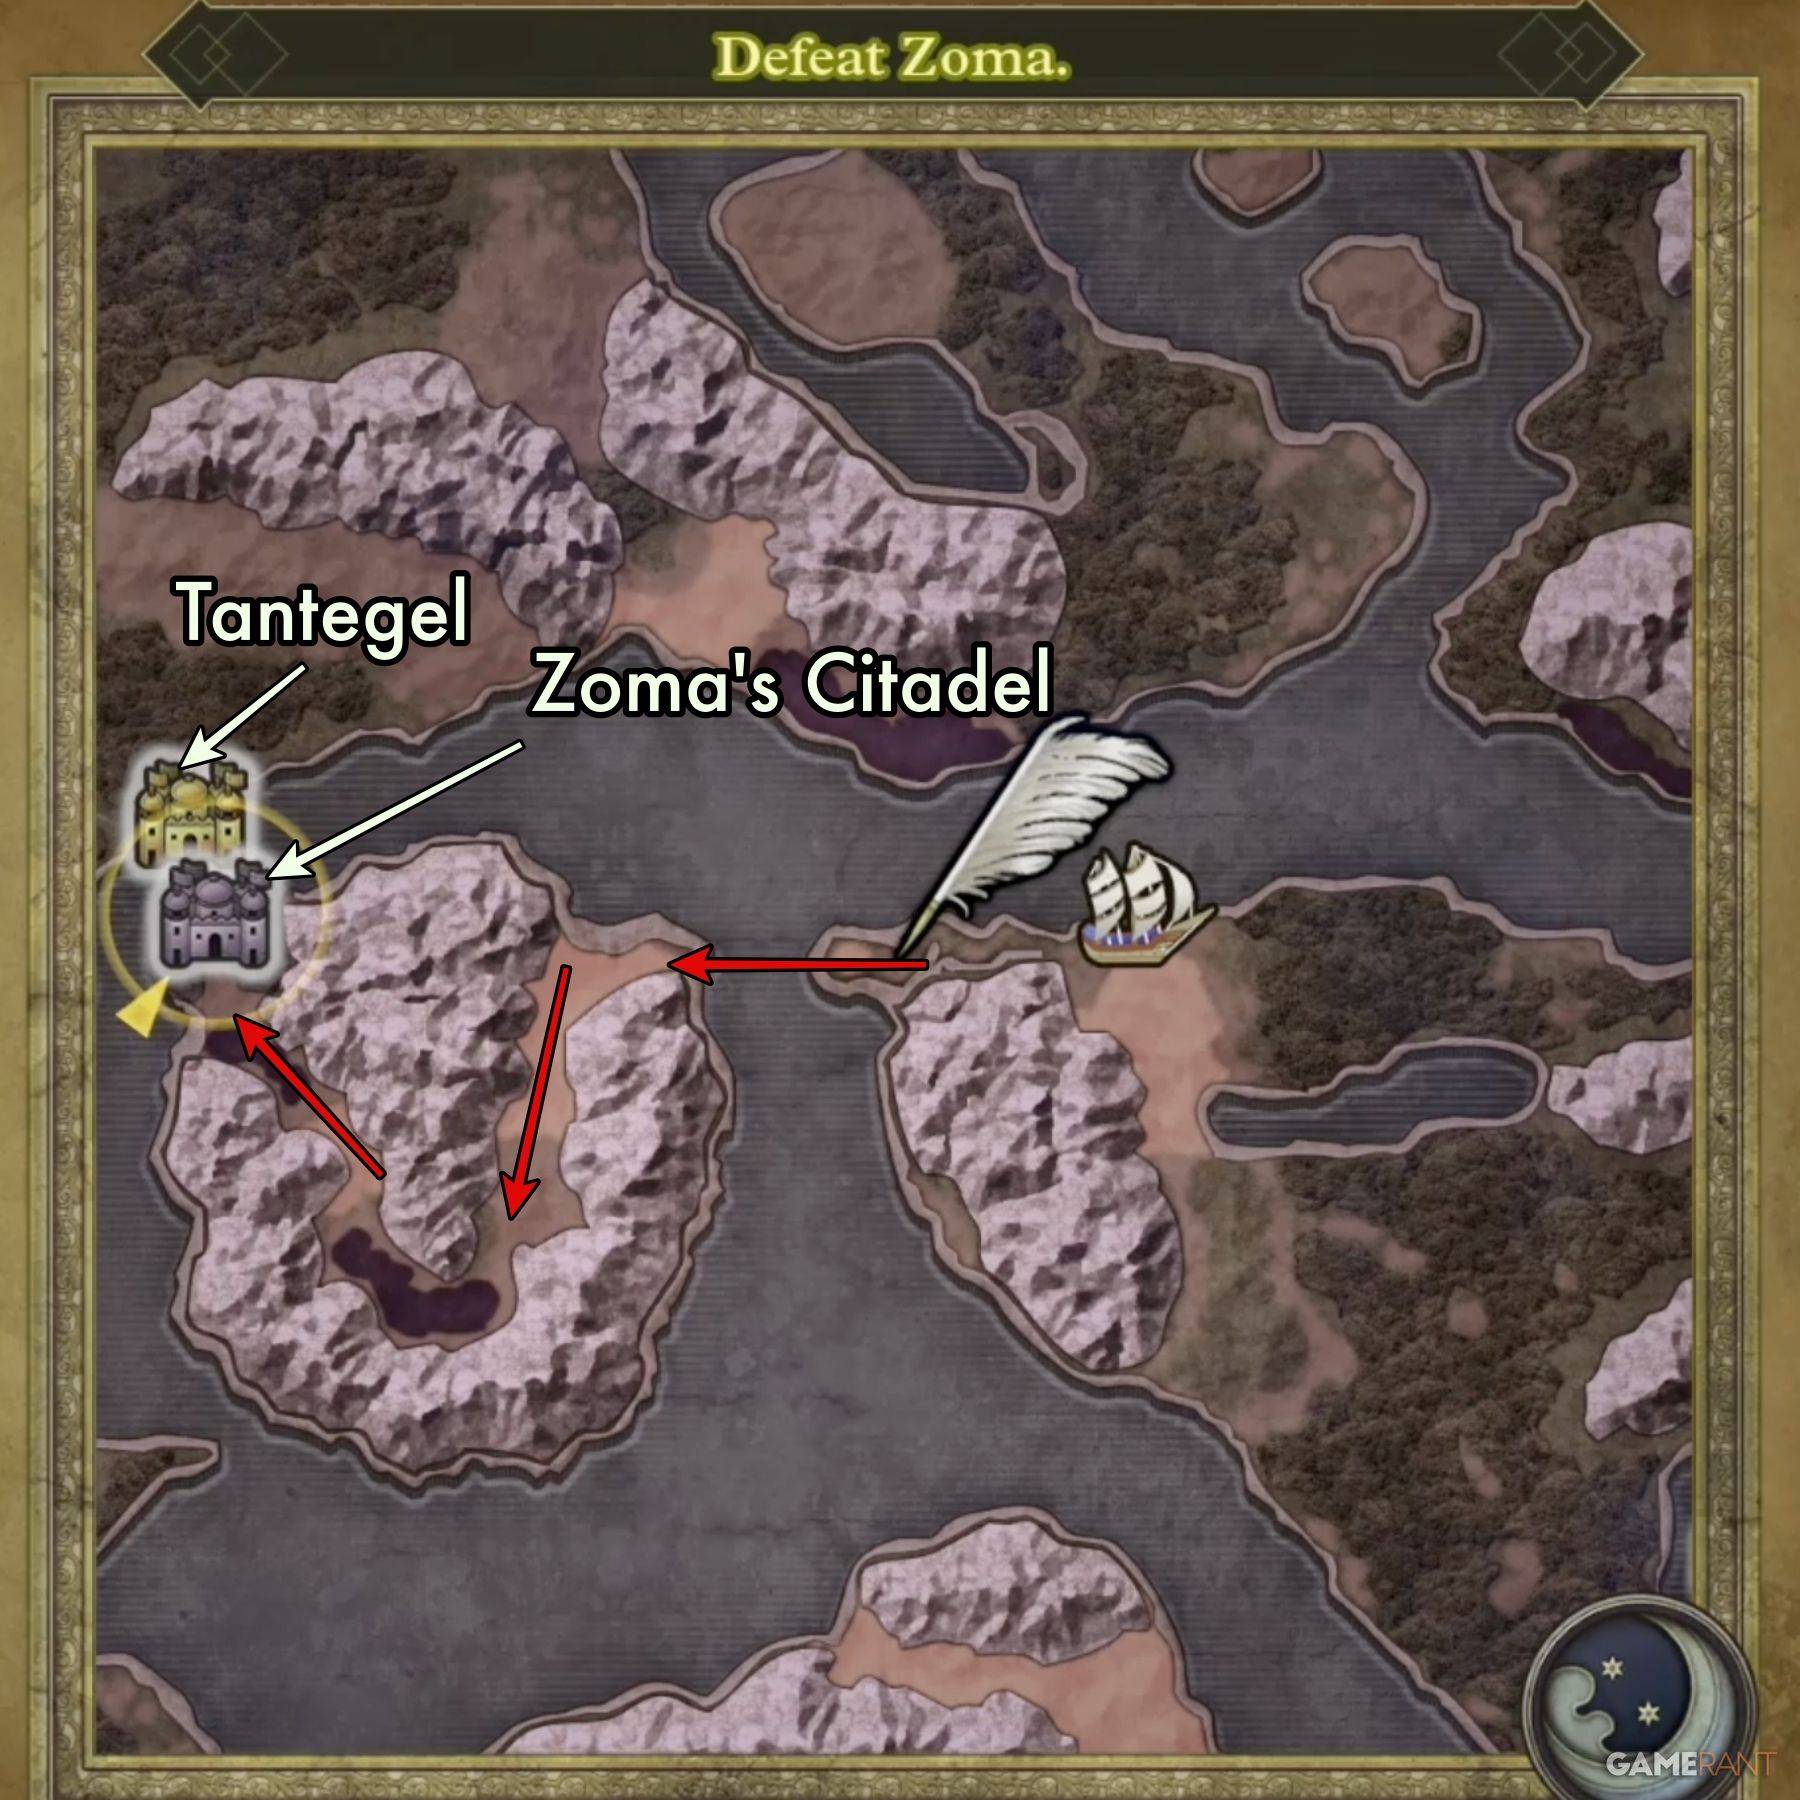
After defeating Baramos, you'll enter the darkened world of Alefgard. To reach Zoma's Citadel, you need the Rainbow Drop, created by combining:
- Sunstone (Tantegel Castle)
- Staff of Rain (Shrine of the Spirit)
- Sacred Amulet (Rubiss, after freeing her in the Tower of Rubiss – requires the Faerie Flute)
The Rainbow Drop creates the Rainbow Bridge leading to the Citadel.
Zoma's Citadel 1F Walkthrough
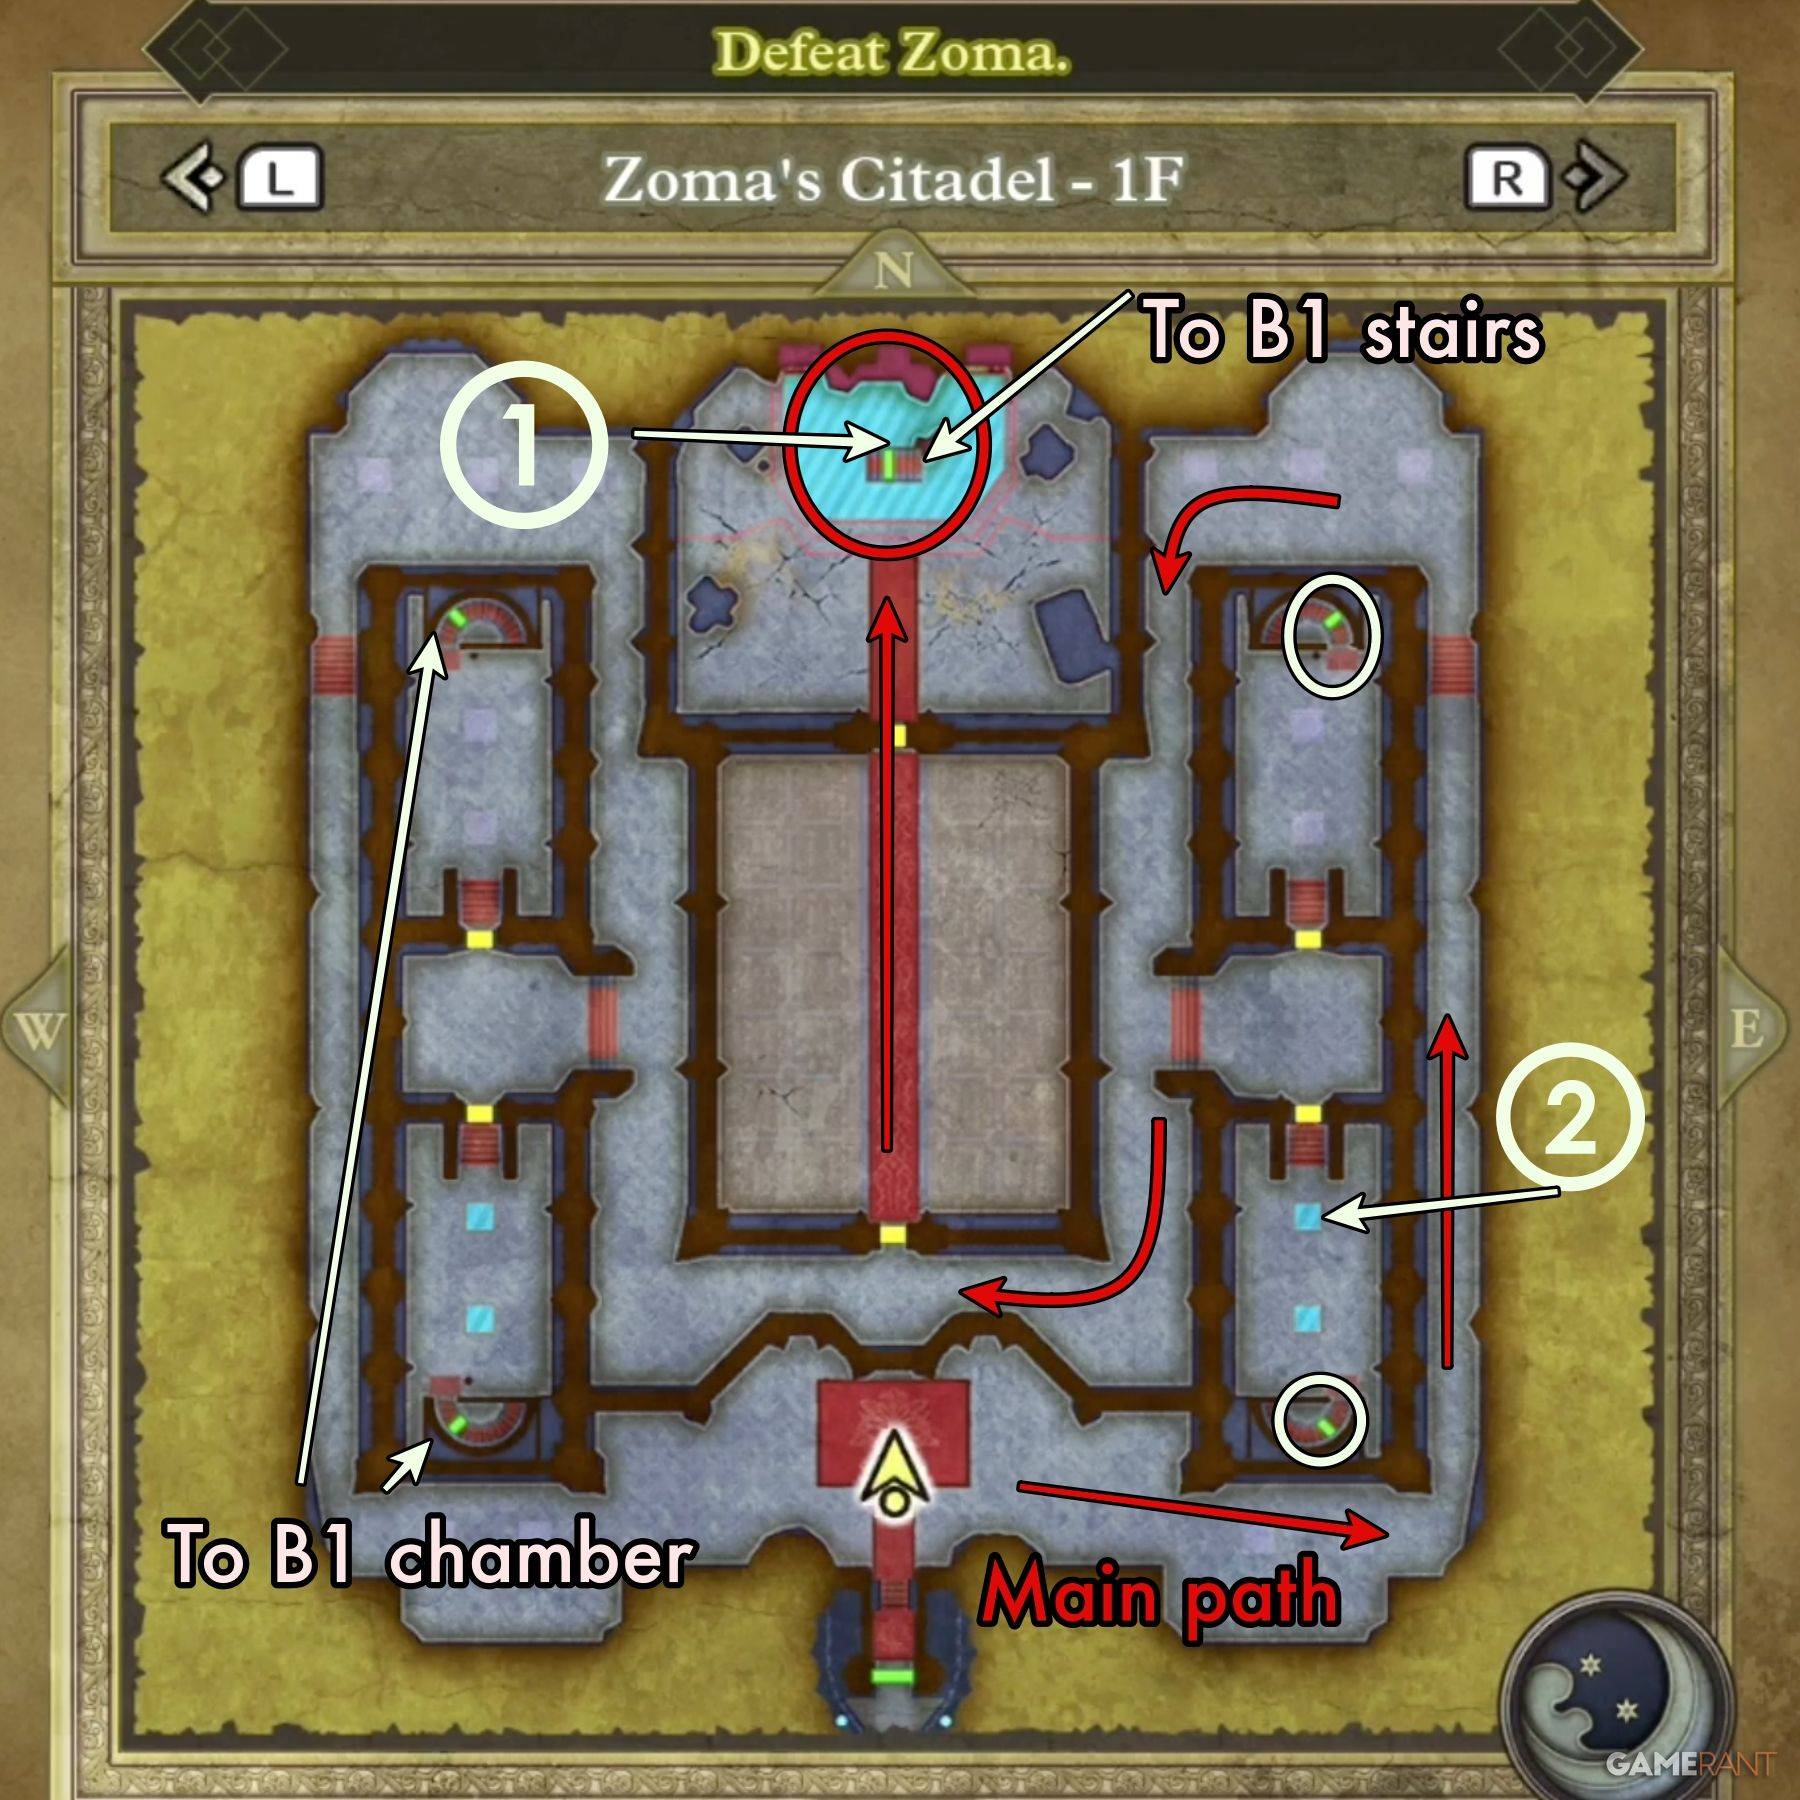
Navigate the first floor to reach the throne in the north. The throne moves to reveal a hidden passage. Explore side chambers for treasure:
- Treasure 1 (Buried): Mini Medal (behind throne)
- Treasure 2 (Buried): Seed of Magic (electrified panel)
Expect a challenging encounter with Living Statues in the central chamber.
Zoma's Citadel B1 Walkthrough
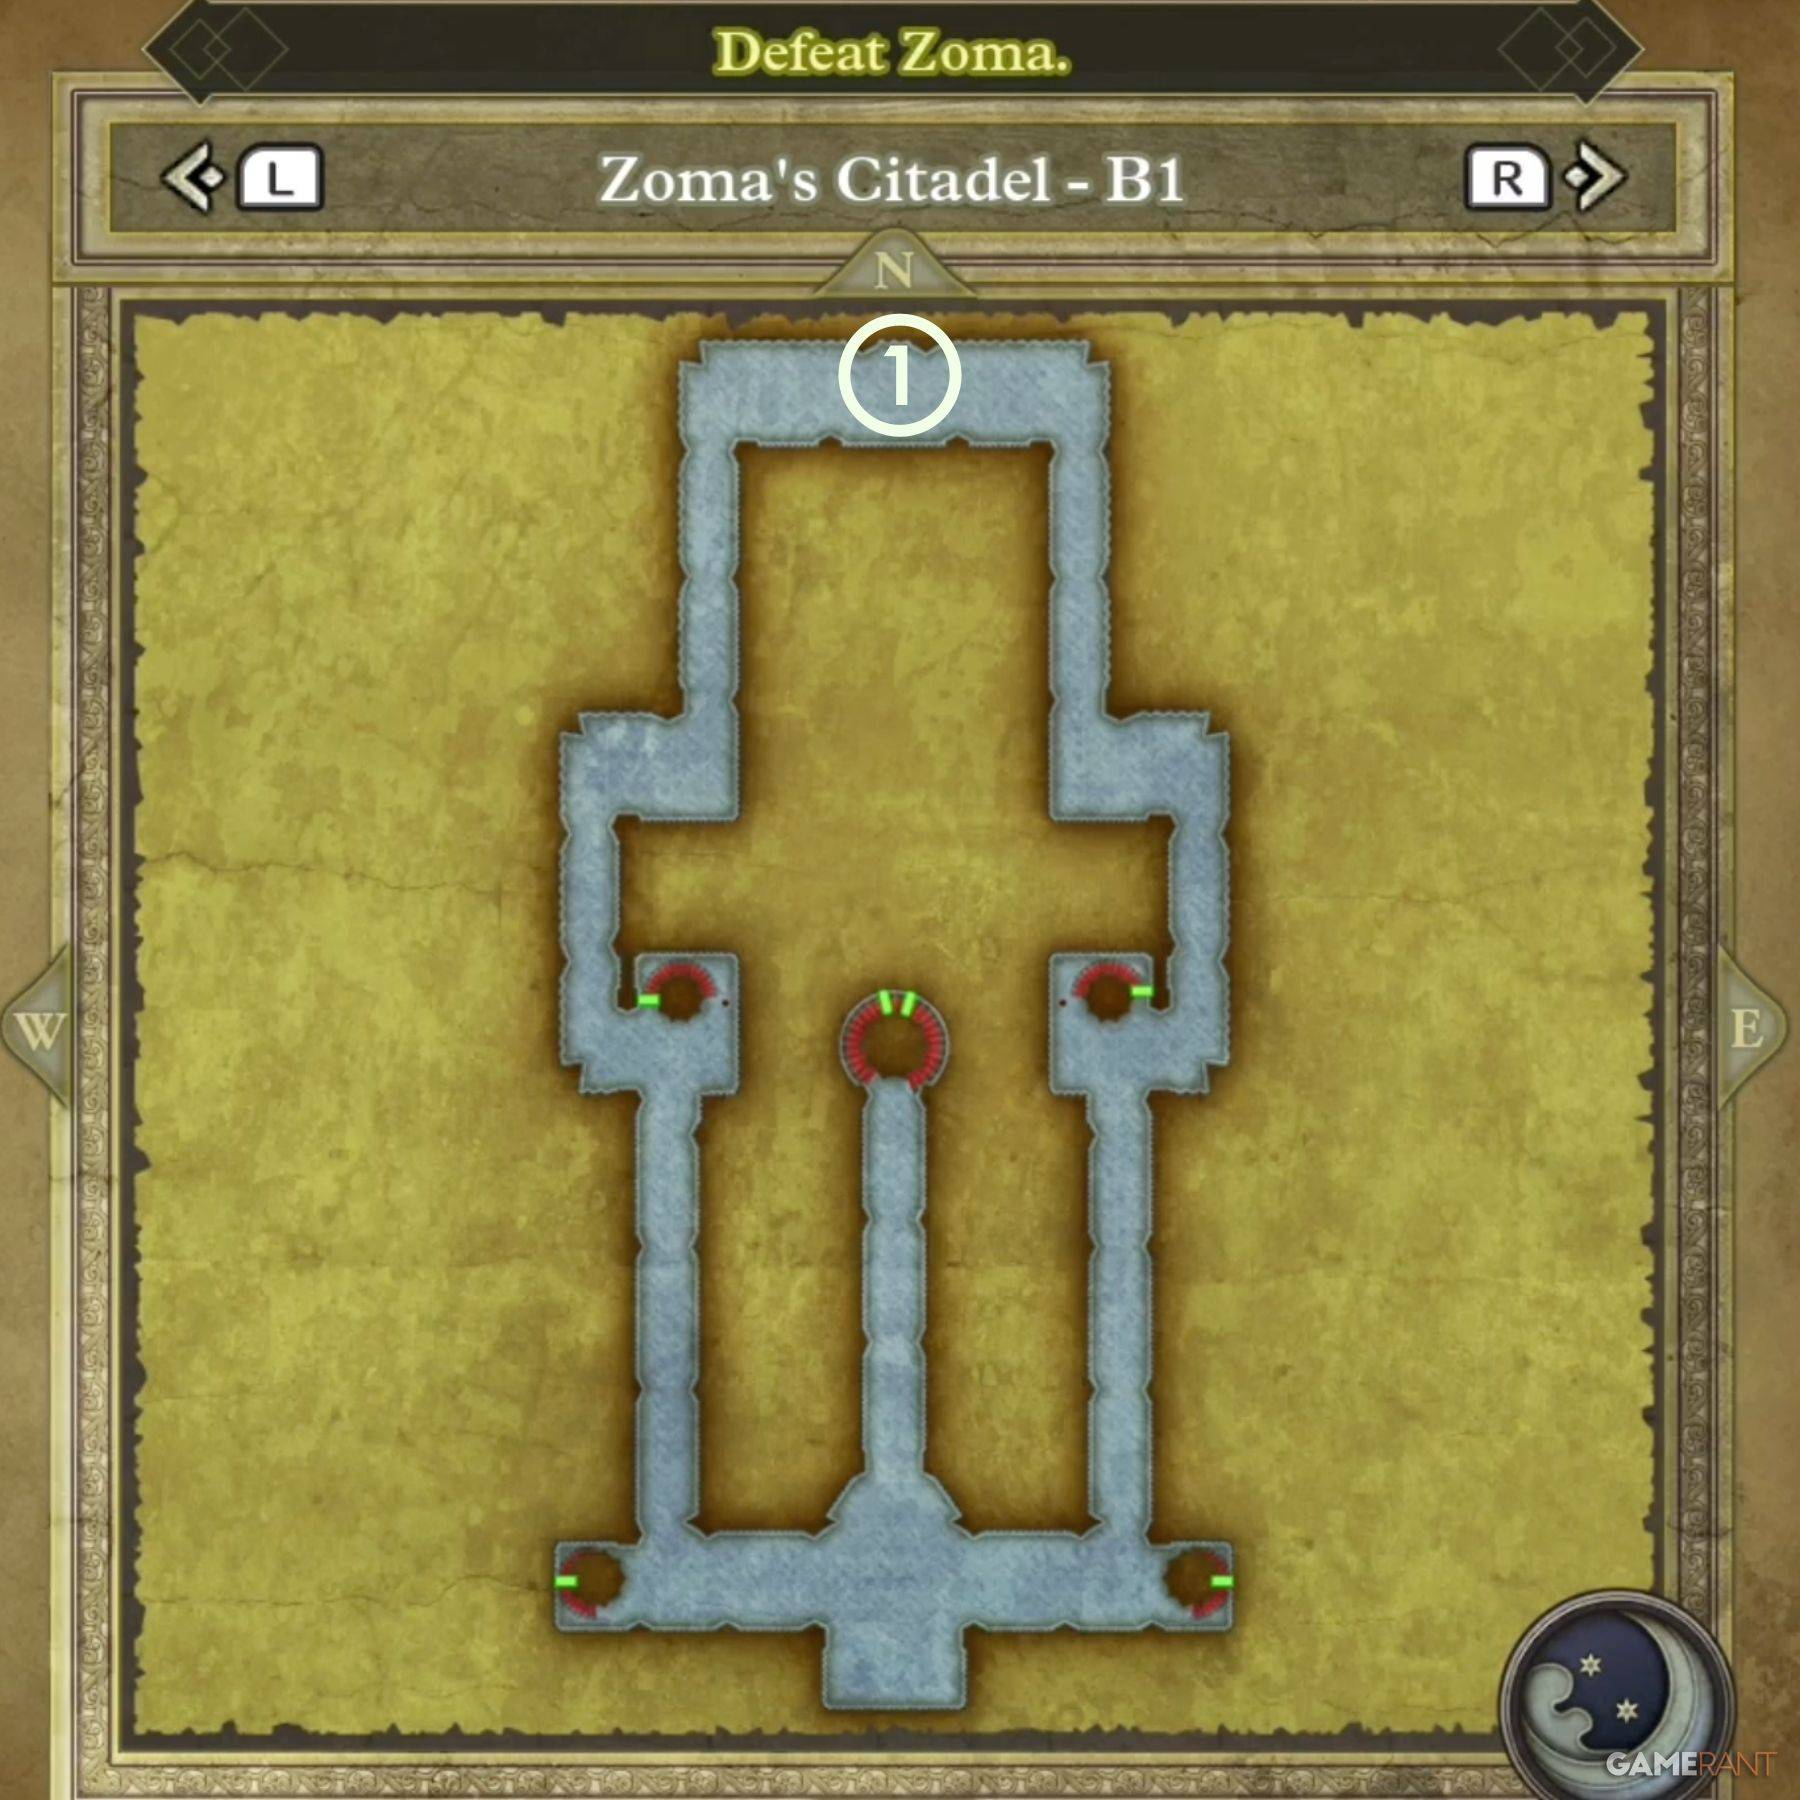
B1 is primarily a passage to B2, unless you take the stairs from the 1F side chambers. Here you'll find:
- Treasure 1 (Chest): Hapless Helm
Zoma's Citadel B2 Walkthrough
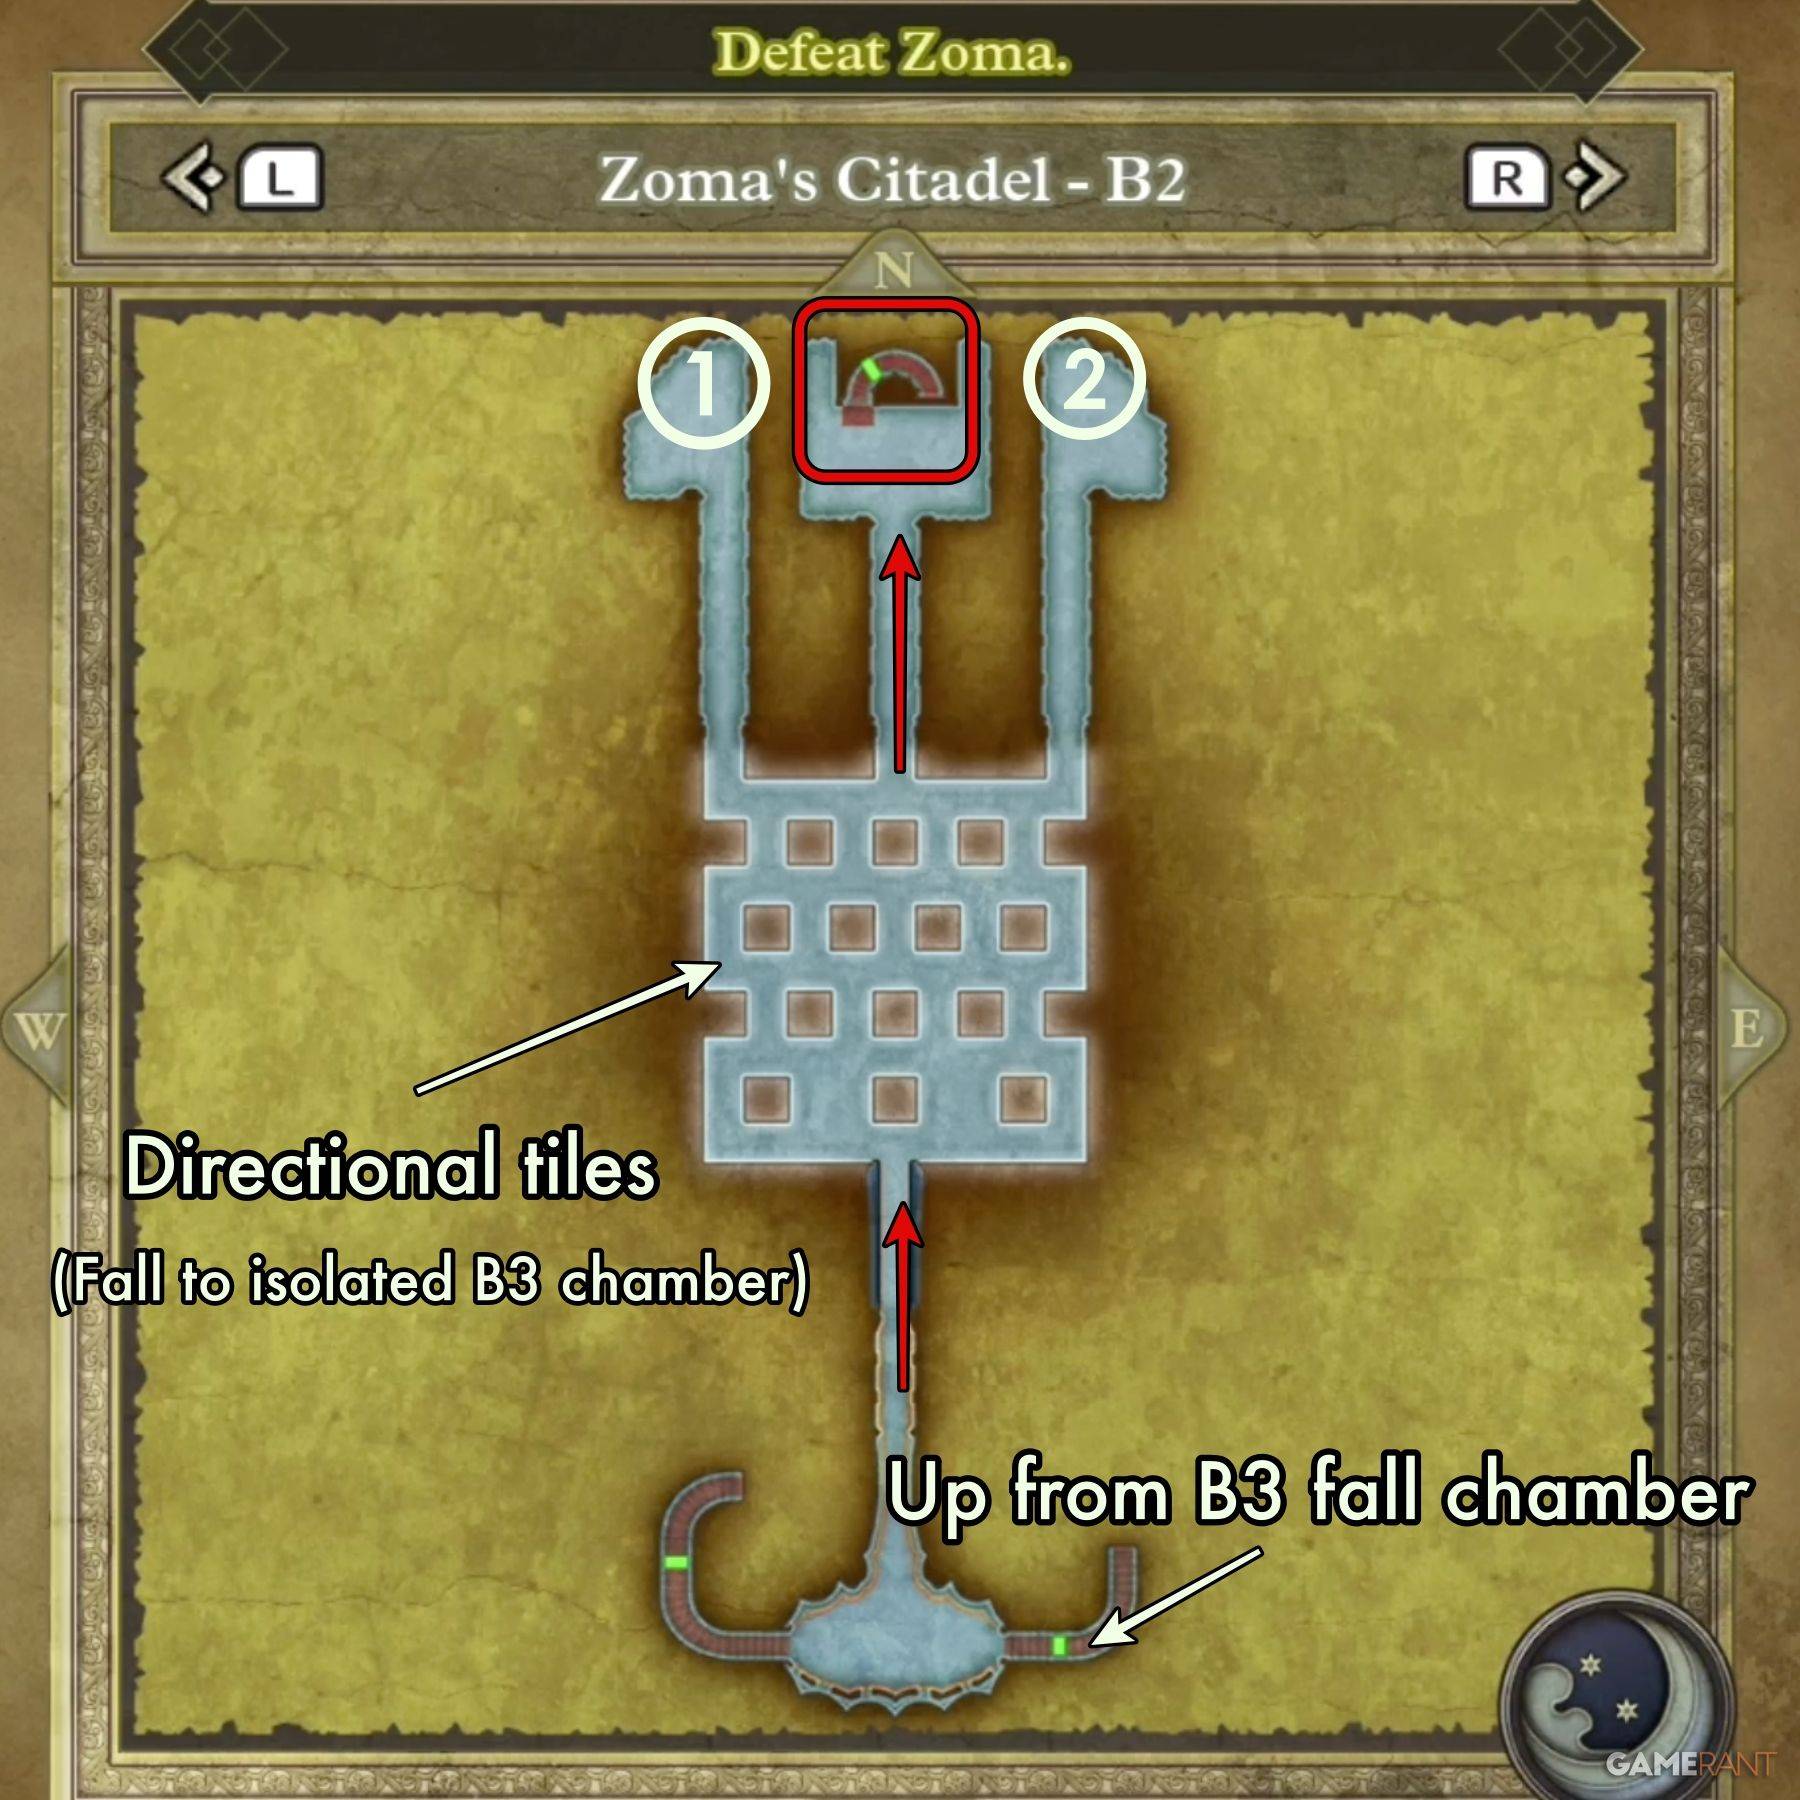
This floor features directional tiles. Practice navigating similar tiles in the Tower of Rubiss (3F, NW corner) if needed. The key is understanding the tile's color-coded directions (blue/orange for North/South, orange arrow for East/West). Collect:
- Treasure 1 (Chest): Scourge Whip
- Treasure 2 (Chest): 4,989 Gold Coins
Zoma's Citadel B3 Walkthrough
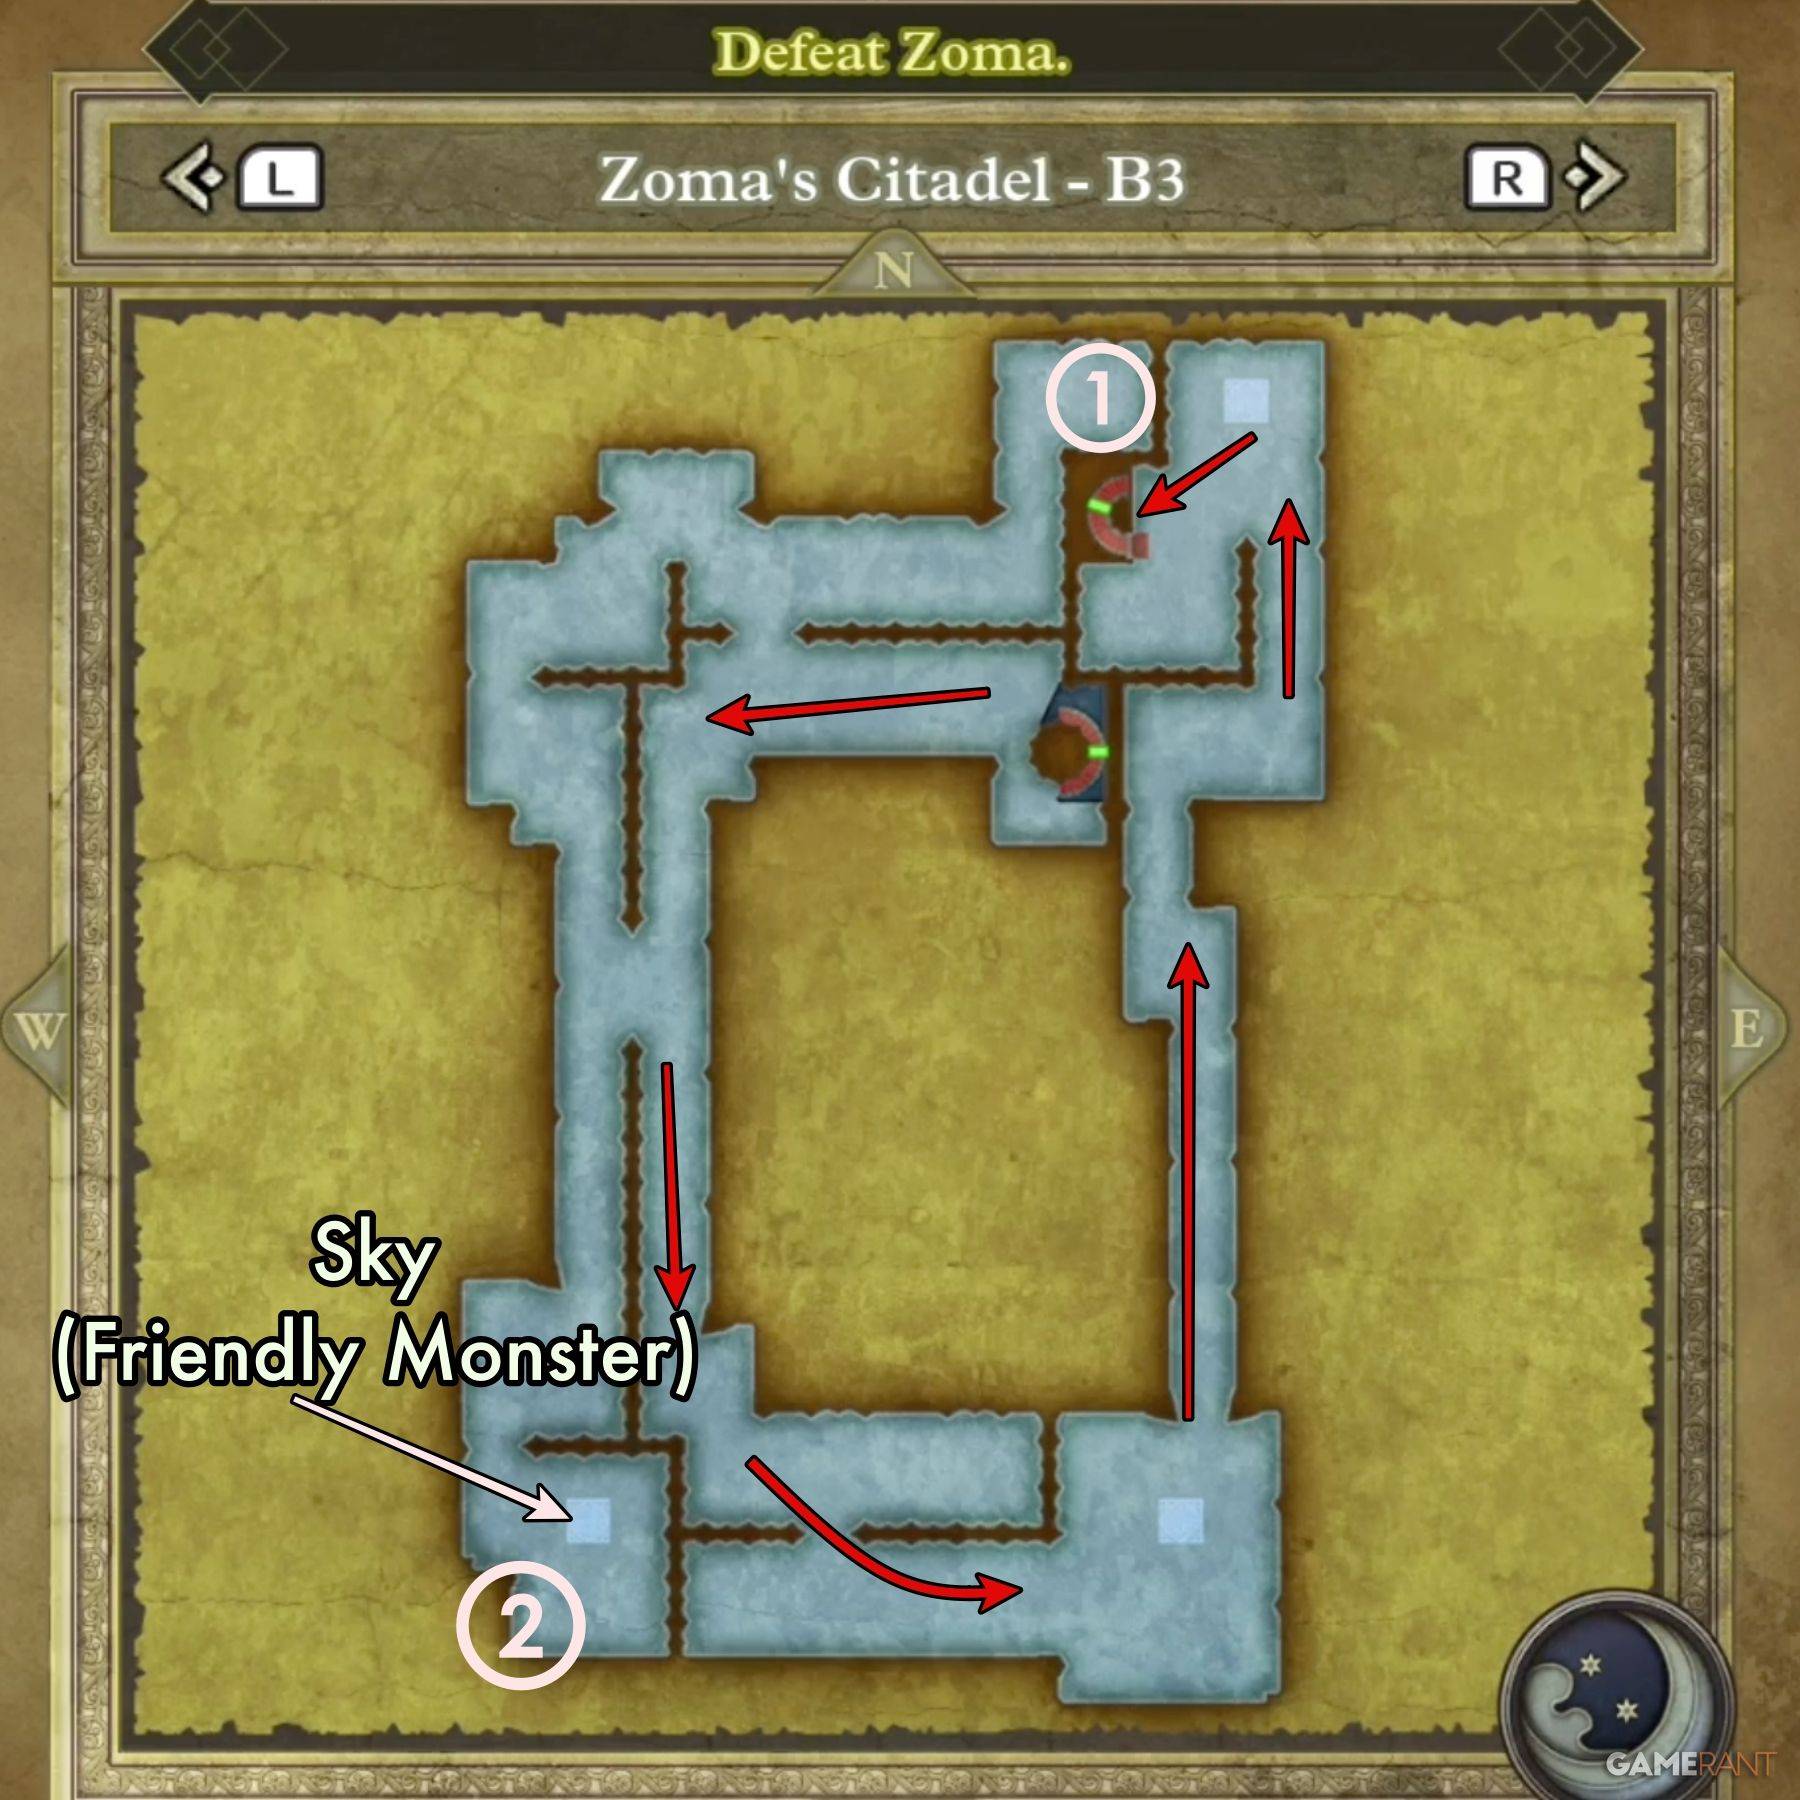
Follow the outer edge of the chamber. A detour to the southwest reveals Sky, a friendly Soaring Scourger. An isolated chamber (accessible via B2's holes) contains a Liquid Metal Slime and:
- Treasure 1 (Chest): Bastard Sword
The main chamber holds:
- Treasure 1 (Chest): Dragon Dojo Duds
- Treasure 2 (Chest): Double-Edged Sword
Zoma's Citadel B4 Walkthrough
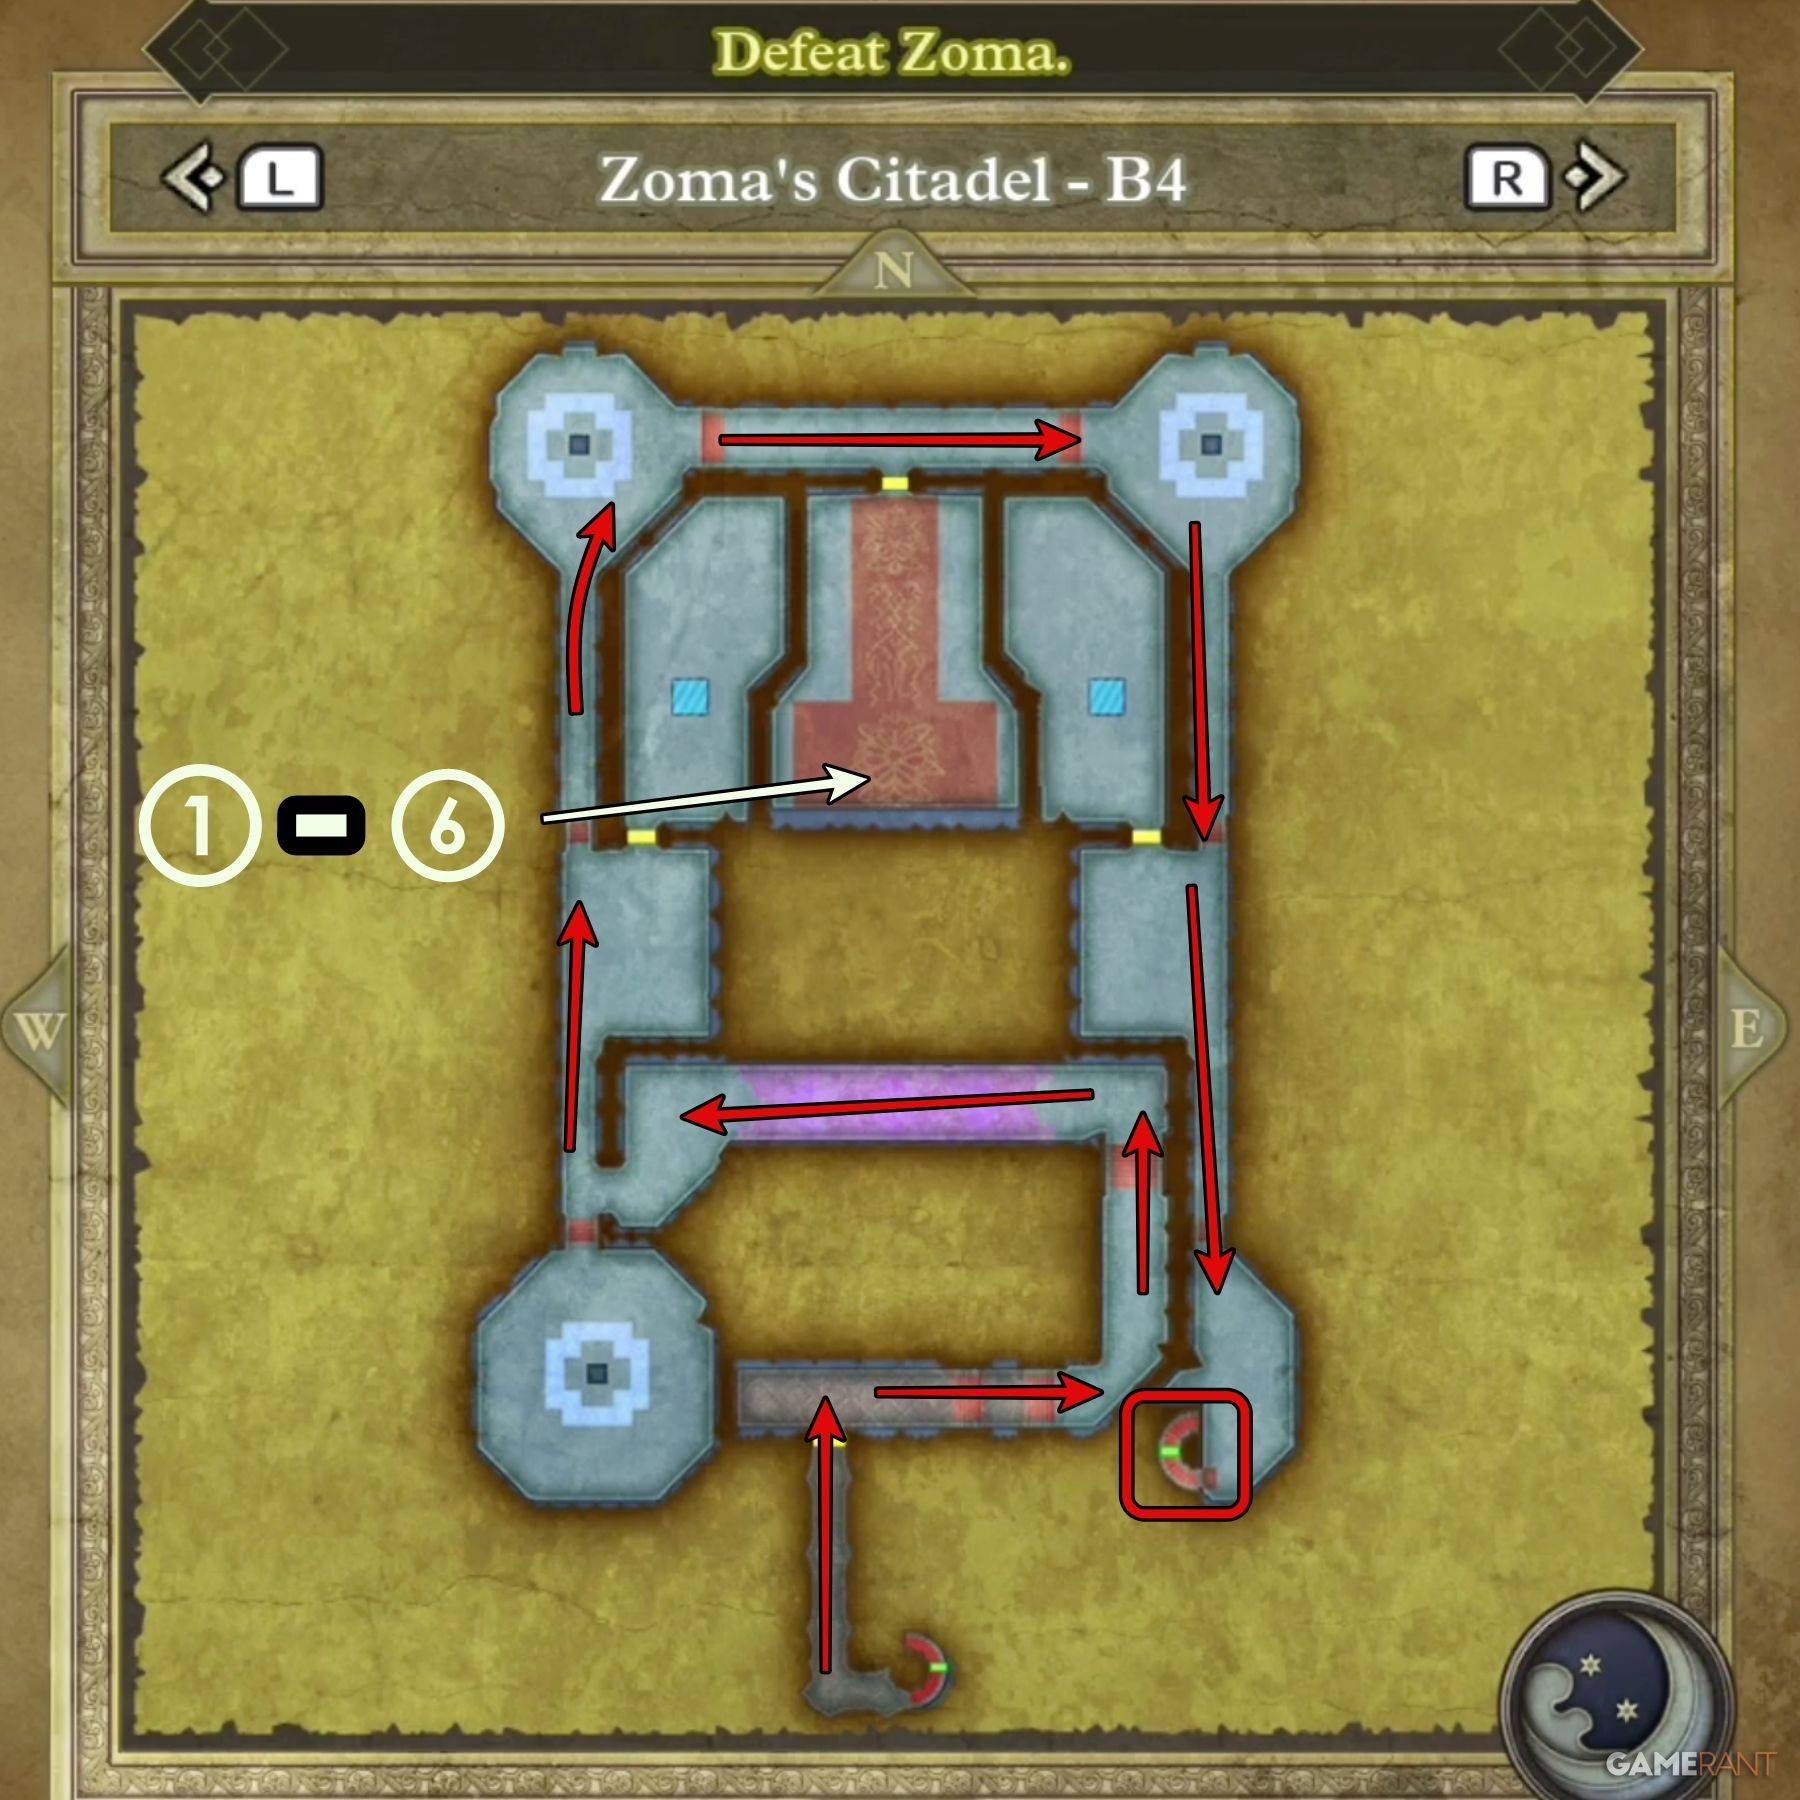
Navigate from the center-south, upwards, then to the southeast exit. Watch the cutscene upon entering. A single chamber contains six chests:
- Treasure 1 (Chest): Shimmering Dress
- Treasure 2 (Chest): Prayer Ring
- Treasure 3 (Chest): Sage's Stone
- Treasure 4 (Chest): Yggdrasil Leaf
- Treasure 5 (Chest): Diamond
- Treasure 6 (Chest): Mini Medal
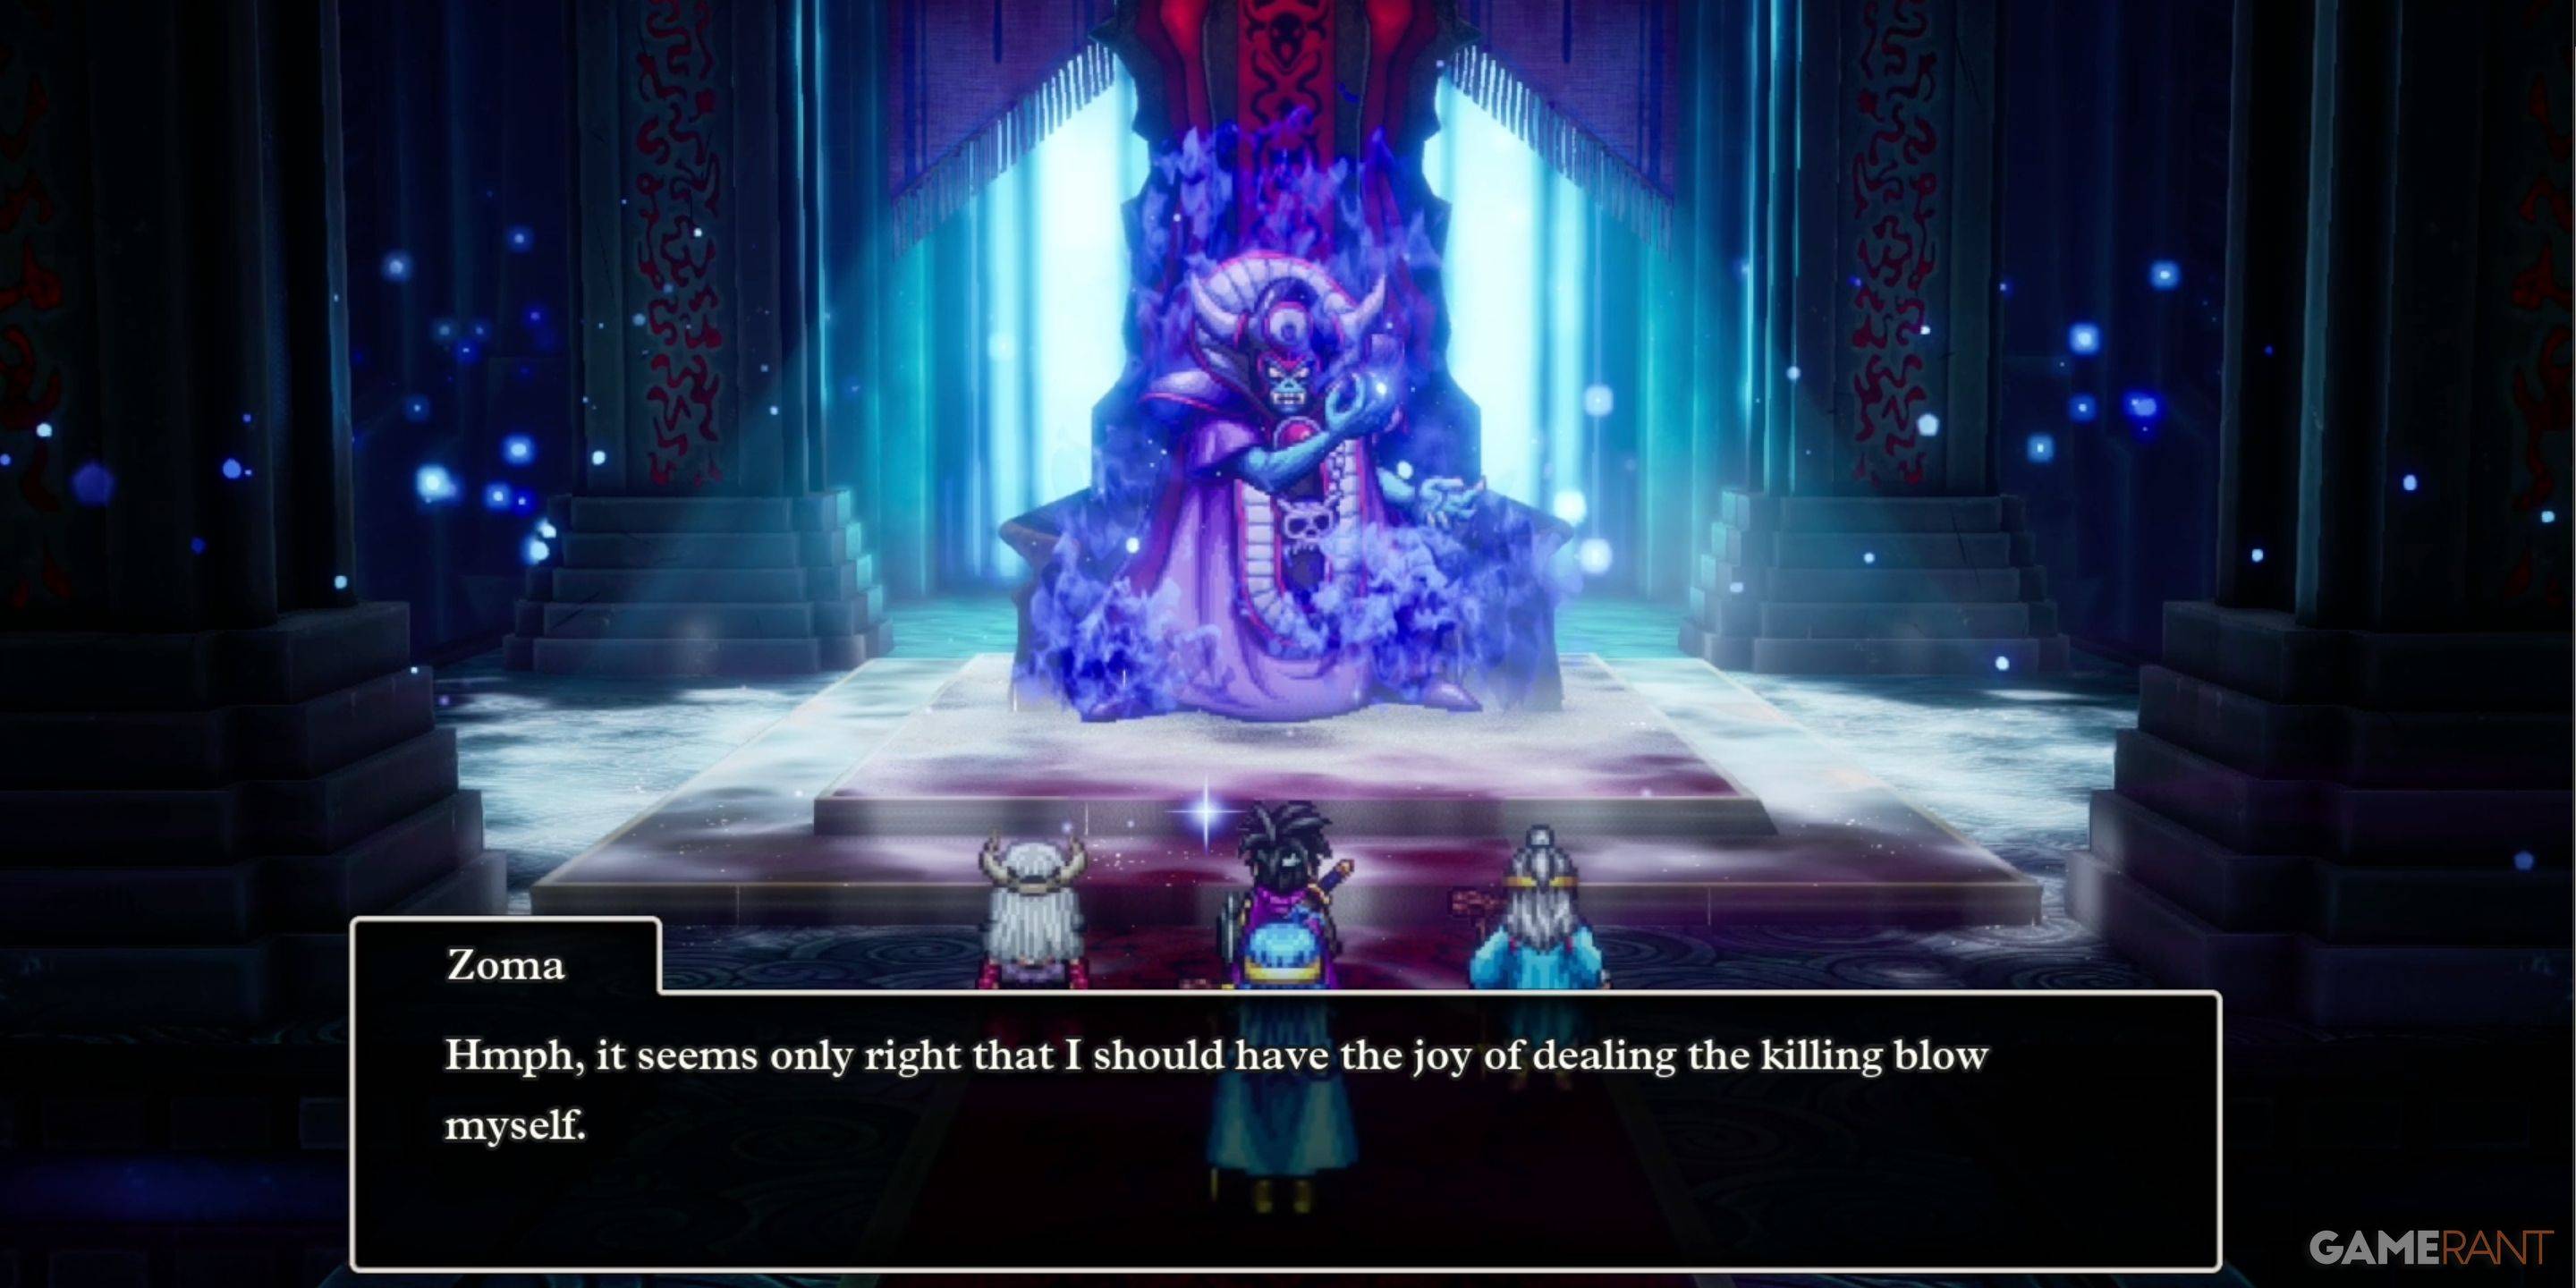
Defeating Zoma and his Minions
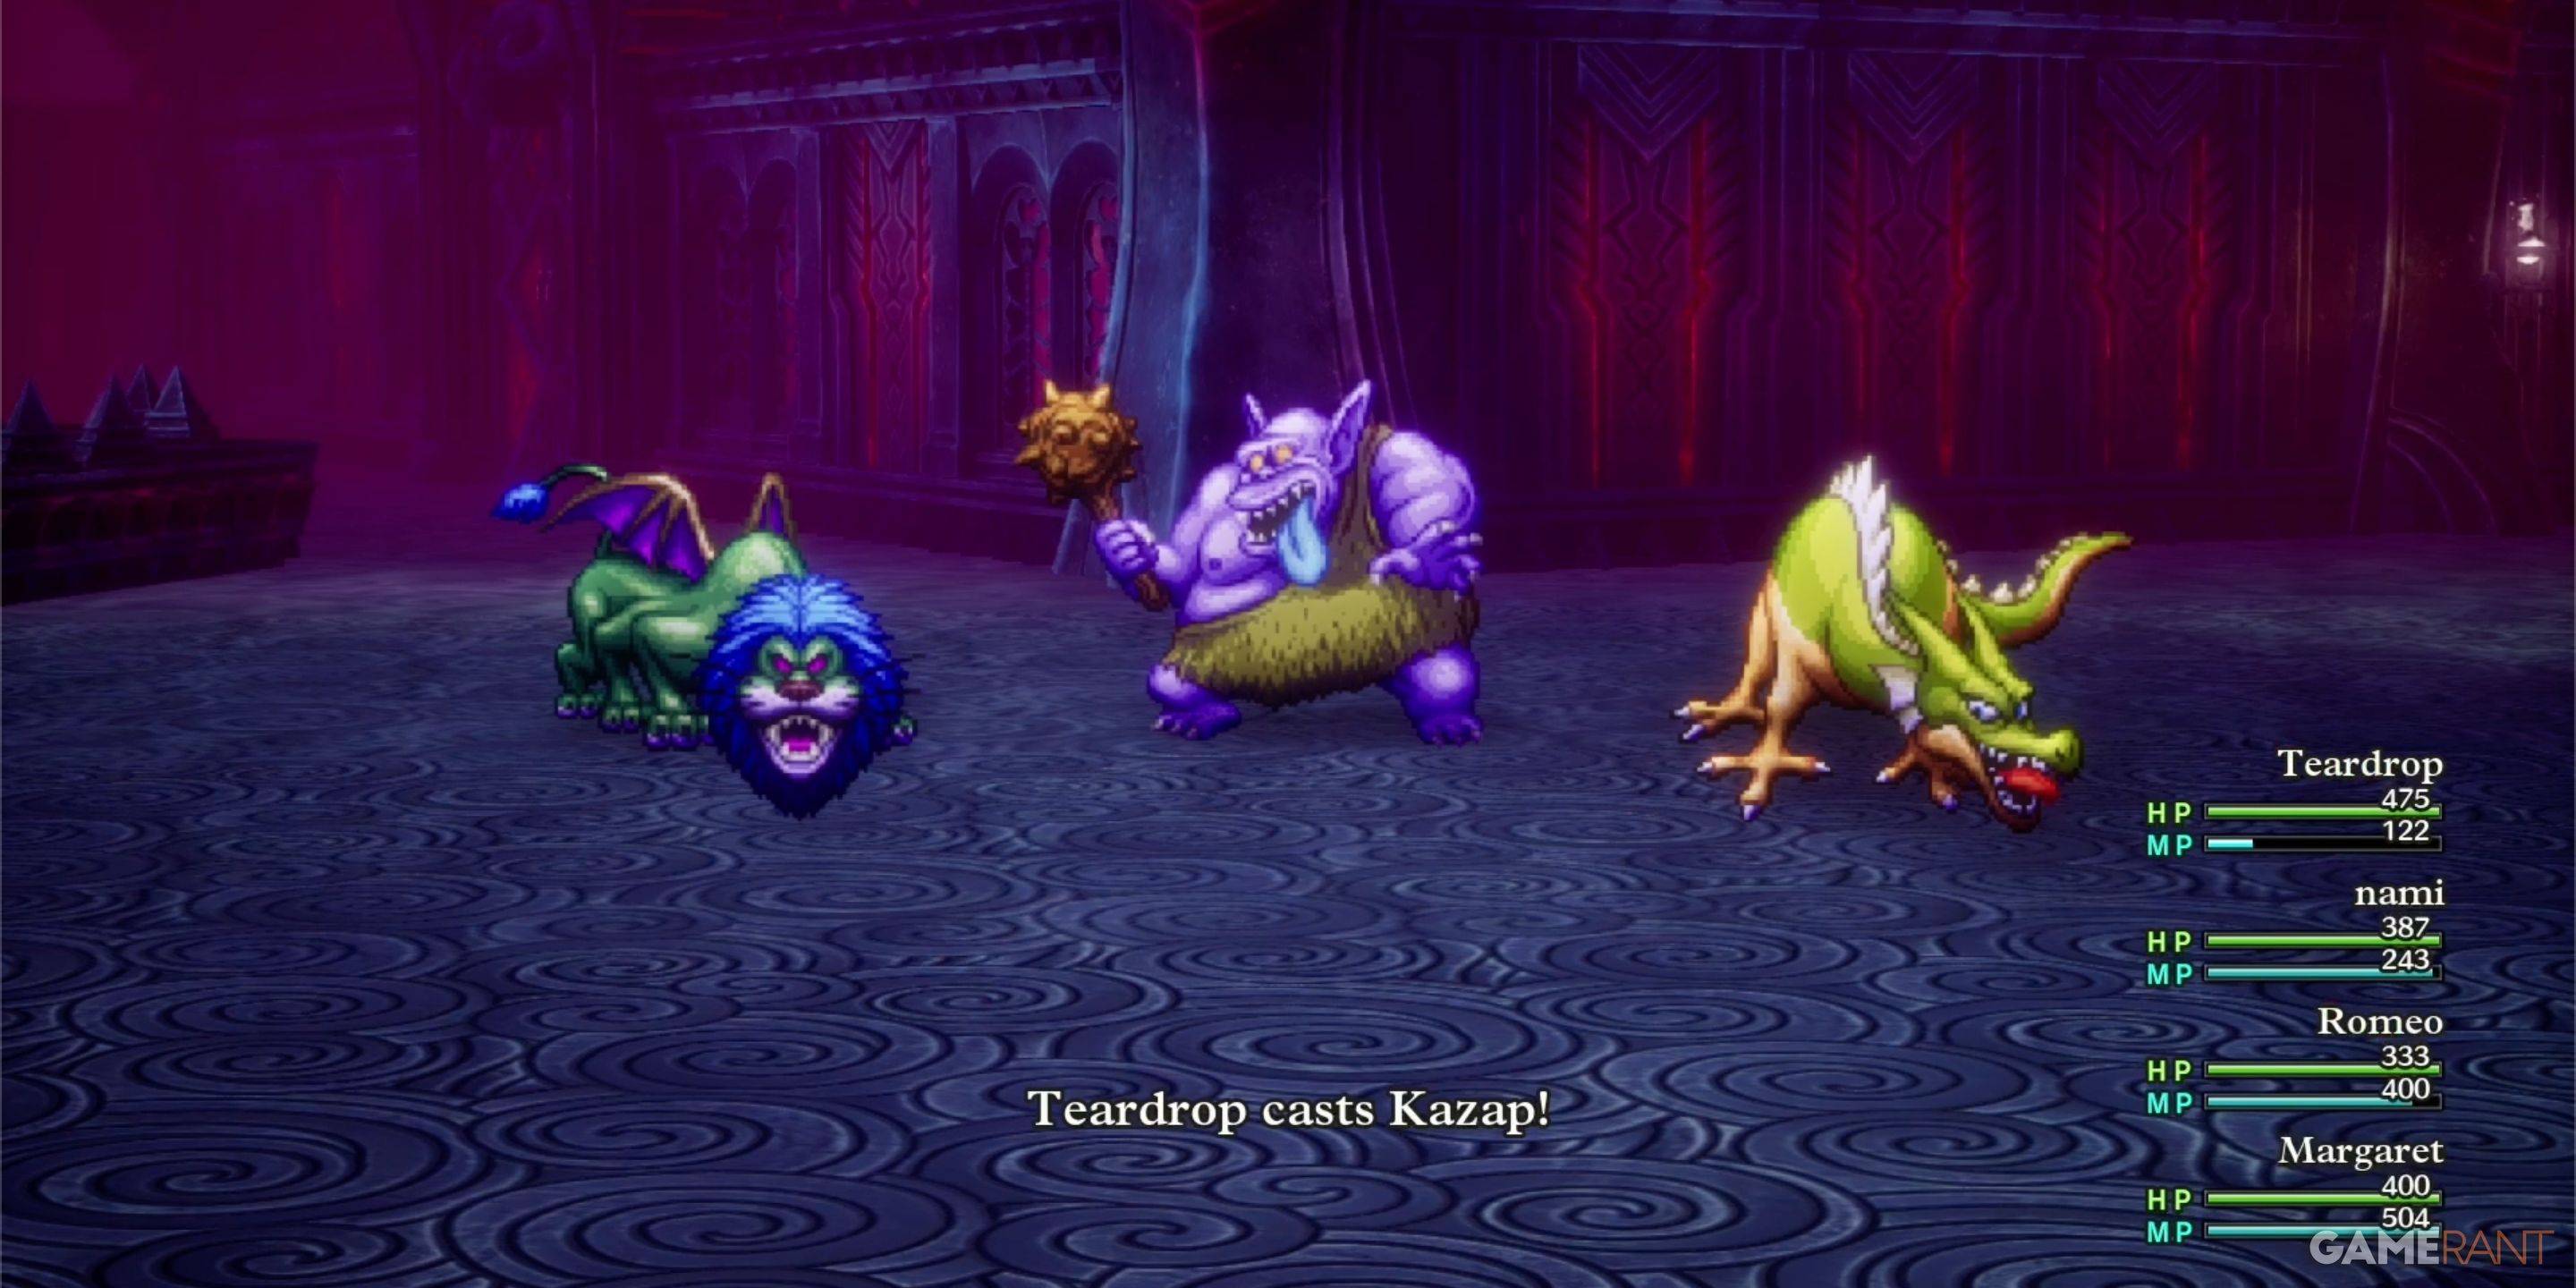
Before facing Zoma, you'll battle:
- King Hydra: Vulnerable to Kazap. Aggressive tactics are effective.
- Soul of Baramos: Weak to Zap. Utilize strategies from the Tower of Rubiss encounter.
- Bones of Baramos: Similar weaknesses to the Soul. Stronger attacks necessitate careful health management.
Zoma: A strategic fight is crucial. Initially, Zoma has a magic barrier. Wait for the prompt to use the Sphere of Light, removing the barrier and making him vulnerable to Zap attacks (Kazap is highly effective). Prioritize HP and revive fallen party members. Buffs, debuffs, and reflective equipment can be advantageous.
Every Monster in Zoma's Citadel
| Monster Name | Weakness |
|---|---|
| Dragon Zombie | None |
| Franticore | None |
| Great Troll | Zap |
| Green Dragon | None |
| Hocus-Poker | None |
| Hydra | None |
| Infernal Serpent | None |
| One-Man Army | Zap |
| Soaring Scourger | Zap |
| Troobloovoodoo | Zap |
This detailed guide should equip you to successfully navigate Zoma's Citadel and claim victory over Zoma in Dragon Quest 3 Remake. Remember to utilize your party's strengths and adapt your strategy as needed.
-
 Jan 27,25Roblox: Bike Obby Codes (January 2025) Bike Obby: Unlock Awesome Rewards with These Roblox Codes! Bike Obby, the Roblox cycling obstacle course, lets you earn in-game currency to upgrade your bike, buy boosters, and customize your ride. Mastering the various tracks requires a top-tier bike, and thankfully, these Bike Obby codes deliver
 -
 Feb 20,25Where to Preorder the Samsung Galaxy S25 and S25 Ultra Smartphones Samsung's Galaxy S25 Series: A Deep Dive into the 2025 Lineup Samsung unveiled its highly anticipated Galaxy S25 series at this year's Unpacked event. The lineup features three models: the Galaxy S25, S25+, and S25 Ultra. Preorders are open now, with shipping commencing February 7th. Samsung's web
 -
 Jan 11,25Jujutsu Kaisen Phantom Parade: Tier List Revealed This Jujutsu Kaisen Phantom Parade tier list helps free-to-play players prioritize character acquisition. Note that this ranking is subject to change with game updates. Tier List: Tier Characters S Satoru Gojo (The Strongest), Nobara Kugisaki (Girl of Steel), Yuta Okkotsu (Lend Me Your Stren
 -
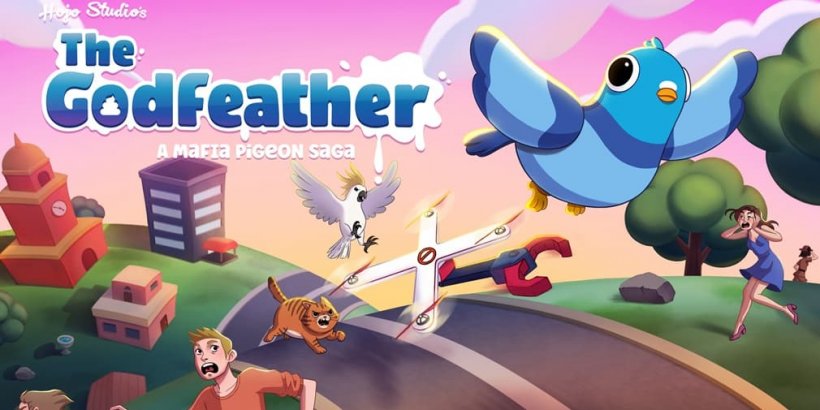 Mar 04,25The Godfeather swoops onto iOS, pre-registration open now! The Godfeather: A Pigeon-Fueled Mafia War Arrives on iOS August 15th! Pre-register now for The Godfeather: A Mafia Pigeon Saga, a roguelike puzzle-action game launching on iOS August 15th! Evade the Pidge Patrol, unleash your avian arsenal (ahem, droppings), and reclaim the neighborhood from both h