


Dragon Quest 3 Remake: Baramos\'s Lair Walkthrough
Conquer Baramos's Lair in Dragon Quest 3 Remake: A Comprehensive Guide
After securing the Six Orbs and hatching Ramia the Everbird, you're poised to challenge Baramos's Lair in Dragon Quest 3 Remake. This formidable dungeon serves as the ultimate test before venturing into the subterranean world. This guide details navigating and conquering Baramos's Lair in the HD-2D Remake.
Baramos, the primary antagonist of Dragon Quest 3 Remake's first half, resides within this dungeon. Access is granted only after acquiring Ramia, who provides aerial transport to the lair's valley. Aim for a party level of at least 20 before embarking on this challenging quest. The lair holds several valuable items, detailed in the sections below.
Reaching Baramos's Lair
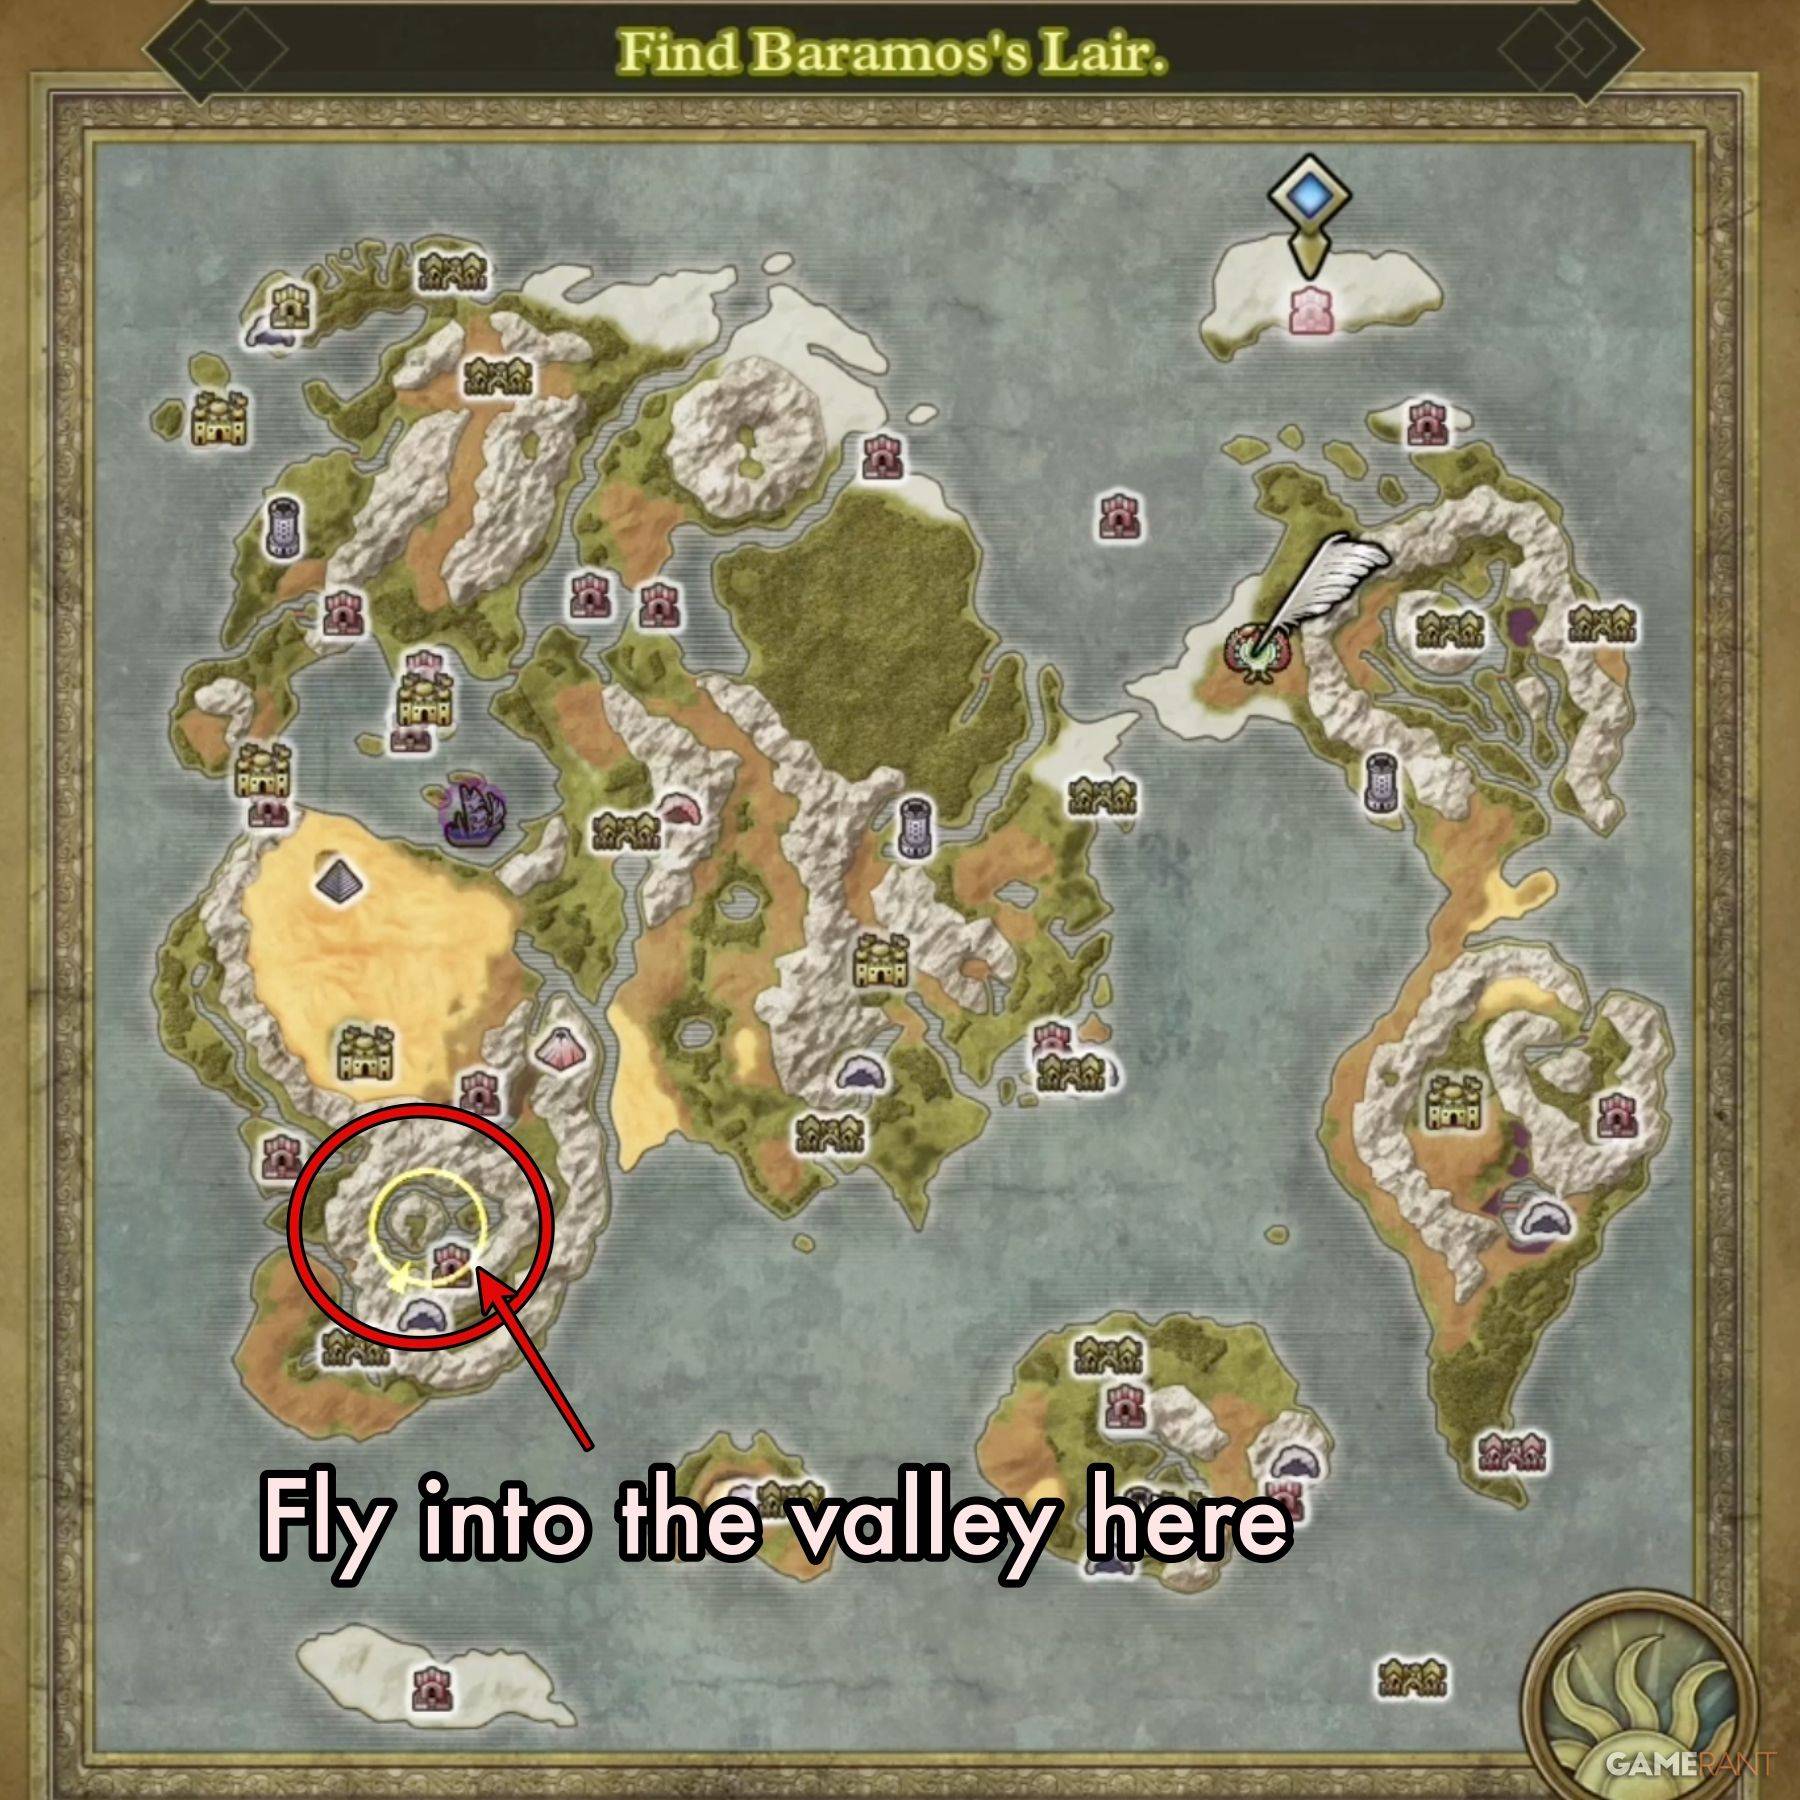
Following the Maw of the Necrogond conquest and acquisition of the Silver Orb, Ramia, the Everbird, becomes accessible. Fly from either the Shrine of the Everbird or the Necrogond Shrine.
North of the Necrogond Shrine lies a mountainous island—Baramos's Lair. Ramia will transport you directly to the dungeon entrance. Proceed north and enter.
Navigating Baramos's Lair
Baramos's Lair deviates from typical dungeon structures. Instead of linear progression, you'll traverse indoor and outdoor areas to reach Baramos.
The initial area, "Baramos's Lair – Surroundings," serves as the central outdoor hub. The following outlines the optimal path to the boss fight:
Reaching Baramos:
- Upon entering from the overworld, bypass the main entrance. Instead, circumnavigate the castle's eastern side towards the northeastern pool.
- Ascend the stairs leading to the pool, then turn left (west) to another stairwell. Ascend and locate a door to your right. Enter.
- Navigate the Eastern Tower to its rooftop exit.
- Traverse the castle roof southwestward, descend, continue west, and pass through gaps in the northwestern double wall. Use the northwestern stairwell.
- The stairwell leads to the Central Tower. Use Safe Passage to cross electrified floor panels, then descend to B1 Passageway A.
- In B1 Passageway A, proceed east to the far eastern stairs.
- Enter the South-East Tower, heading northeast to the upper level. Traverse the roof westward and descend to the tower's western section. Cross the grass northwestward and enter the only available door.
- This leads to the Central Tower's northeast corner. Exit via the single pathway.
- You'll be in B1 Passageway B. Proceed north to the stairs.
- Enter the Throne Room. Avoid floor panels and exit southward.
- You're back in the Surroundings area. The Throne Room is northwest; head east to the northeastern island structure—Baramos's Den, the boss arena.
Baramos's Lair Treasure
Surroundings:
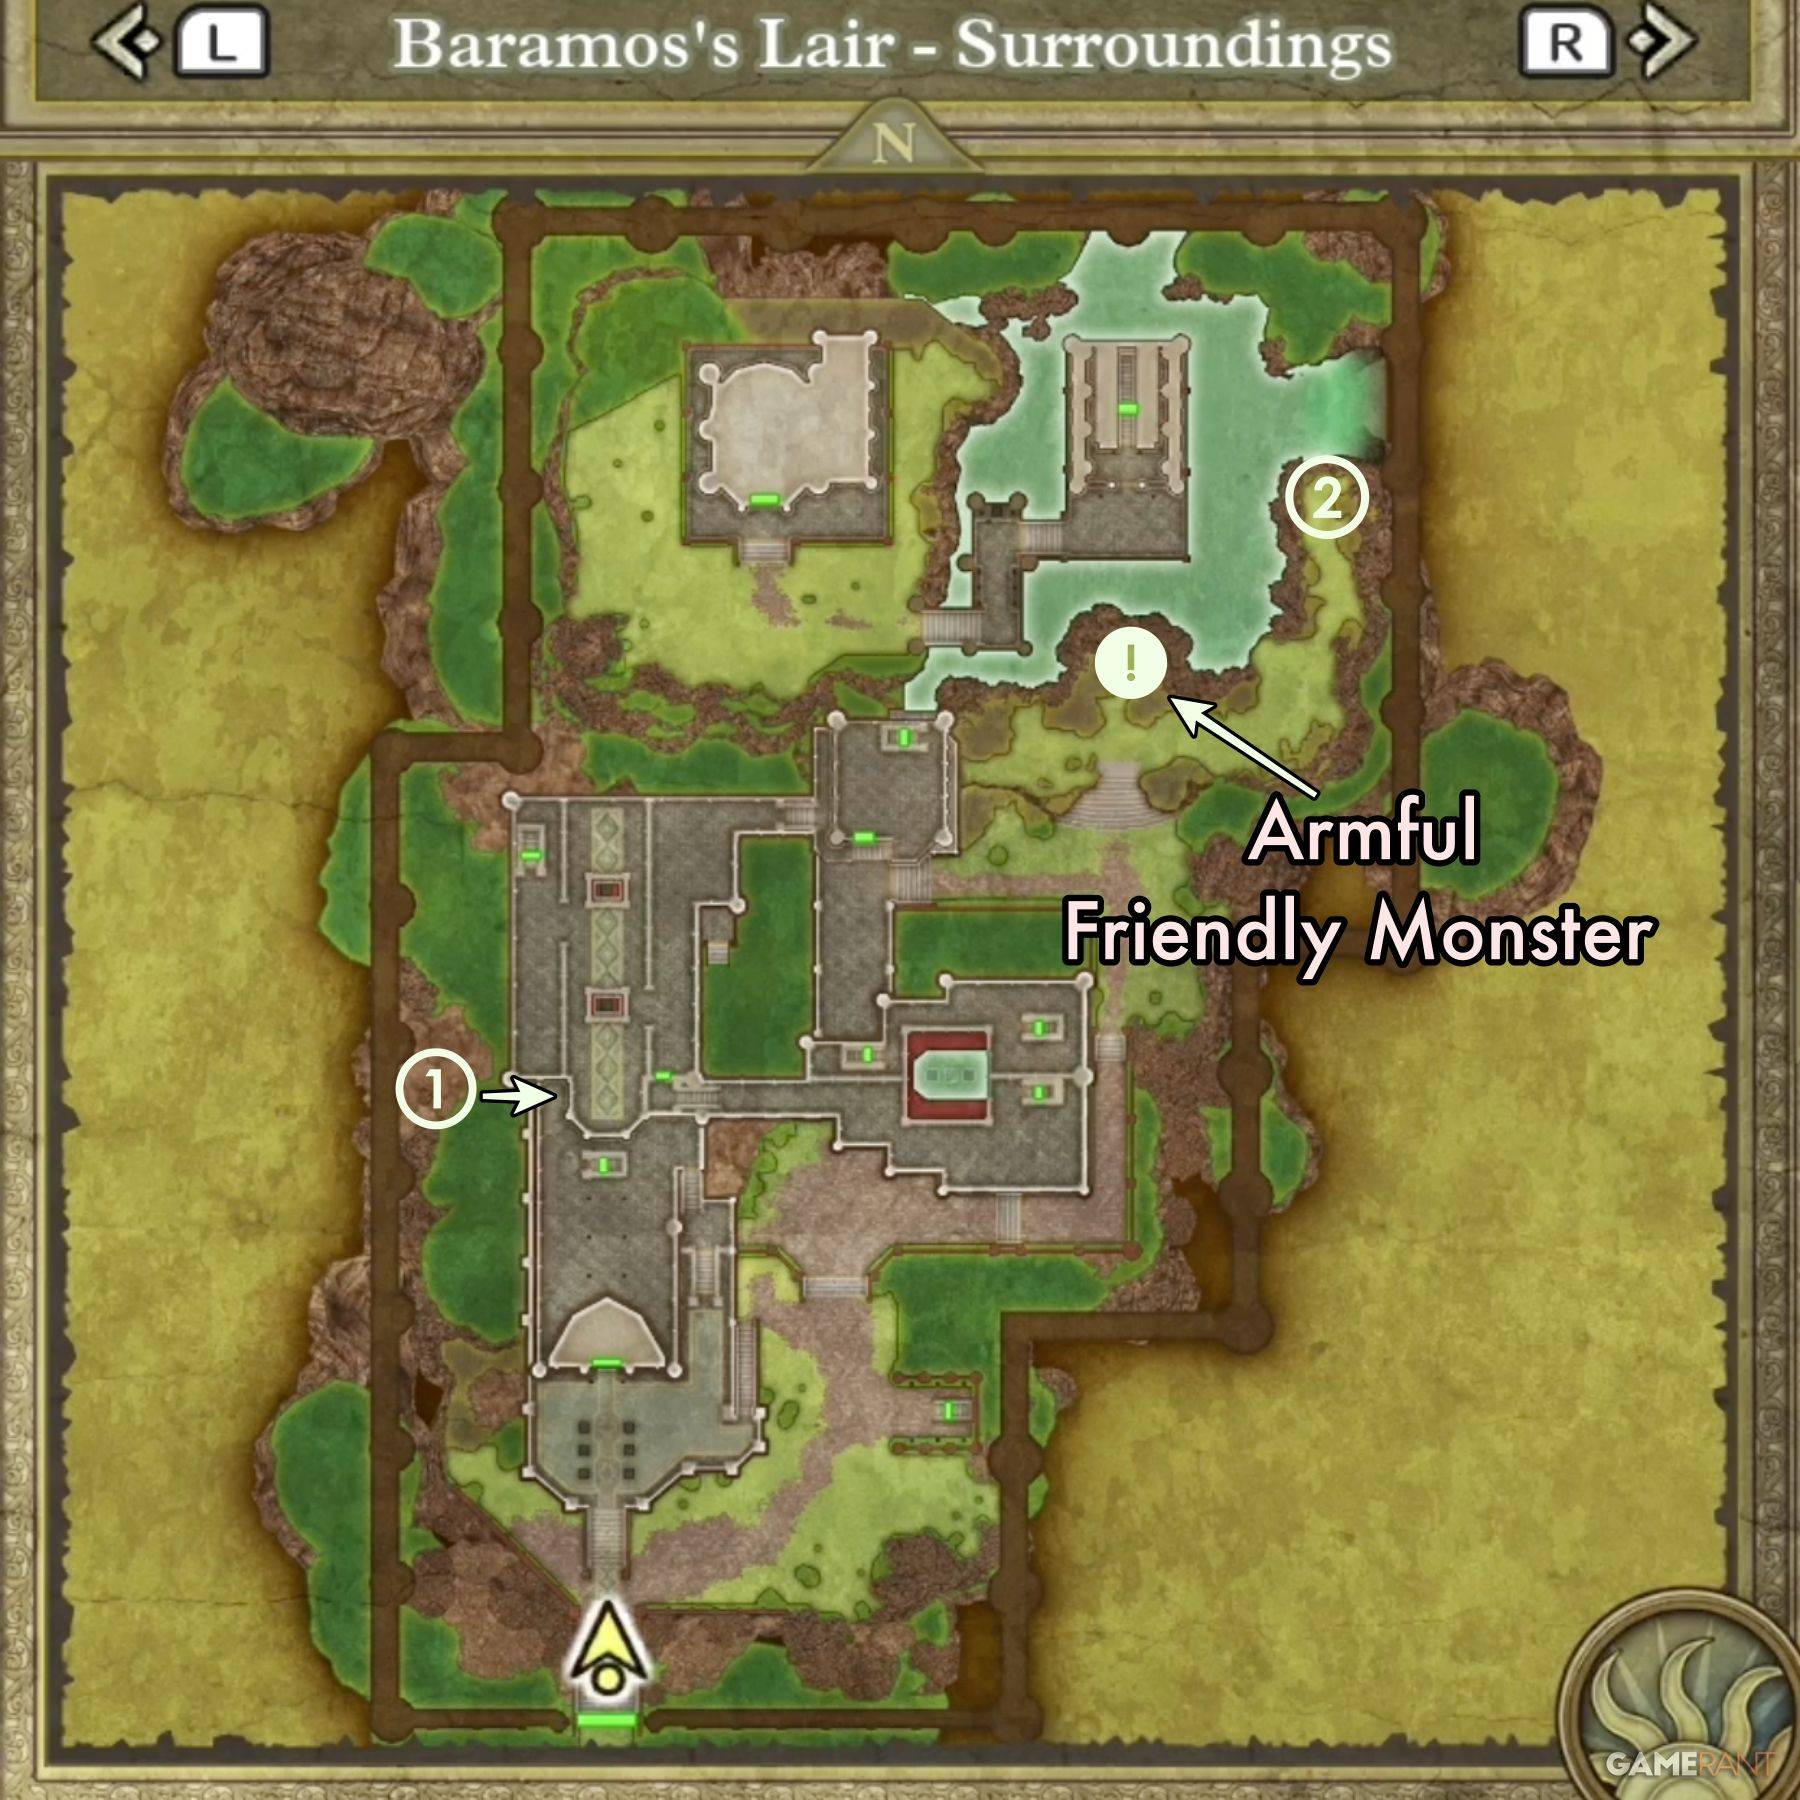
- Treasure 1 (Chest): Prayer Ring
- Treasure 2 (Buried): Flowing Dress
Central Tower:
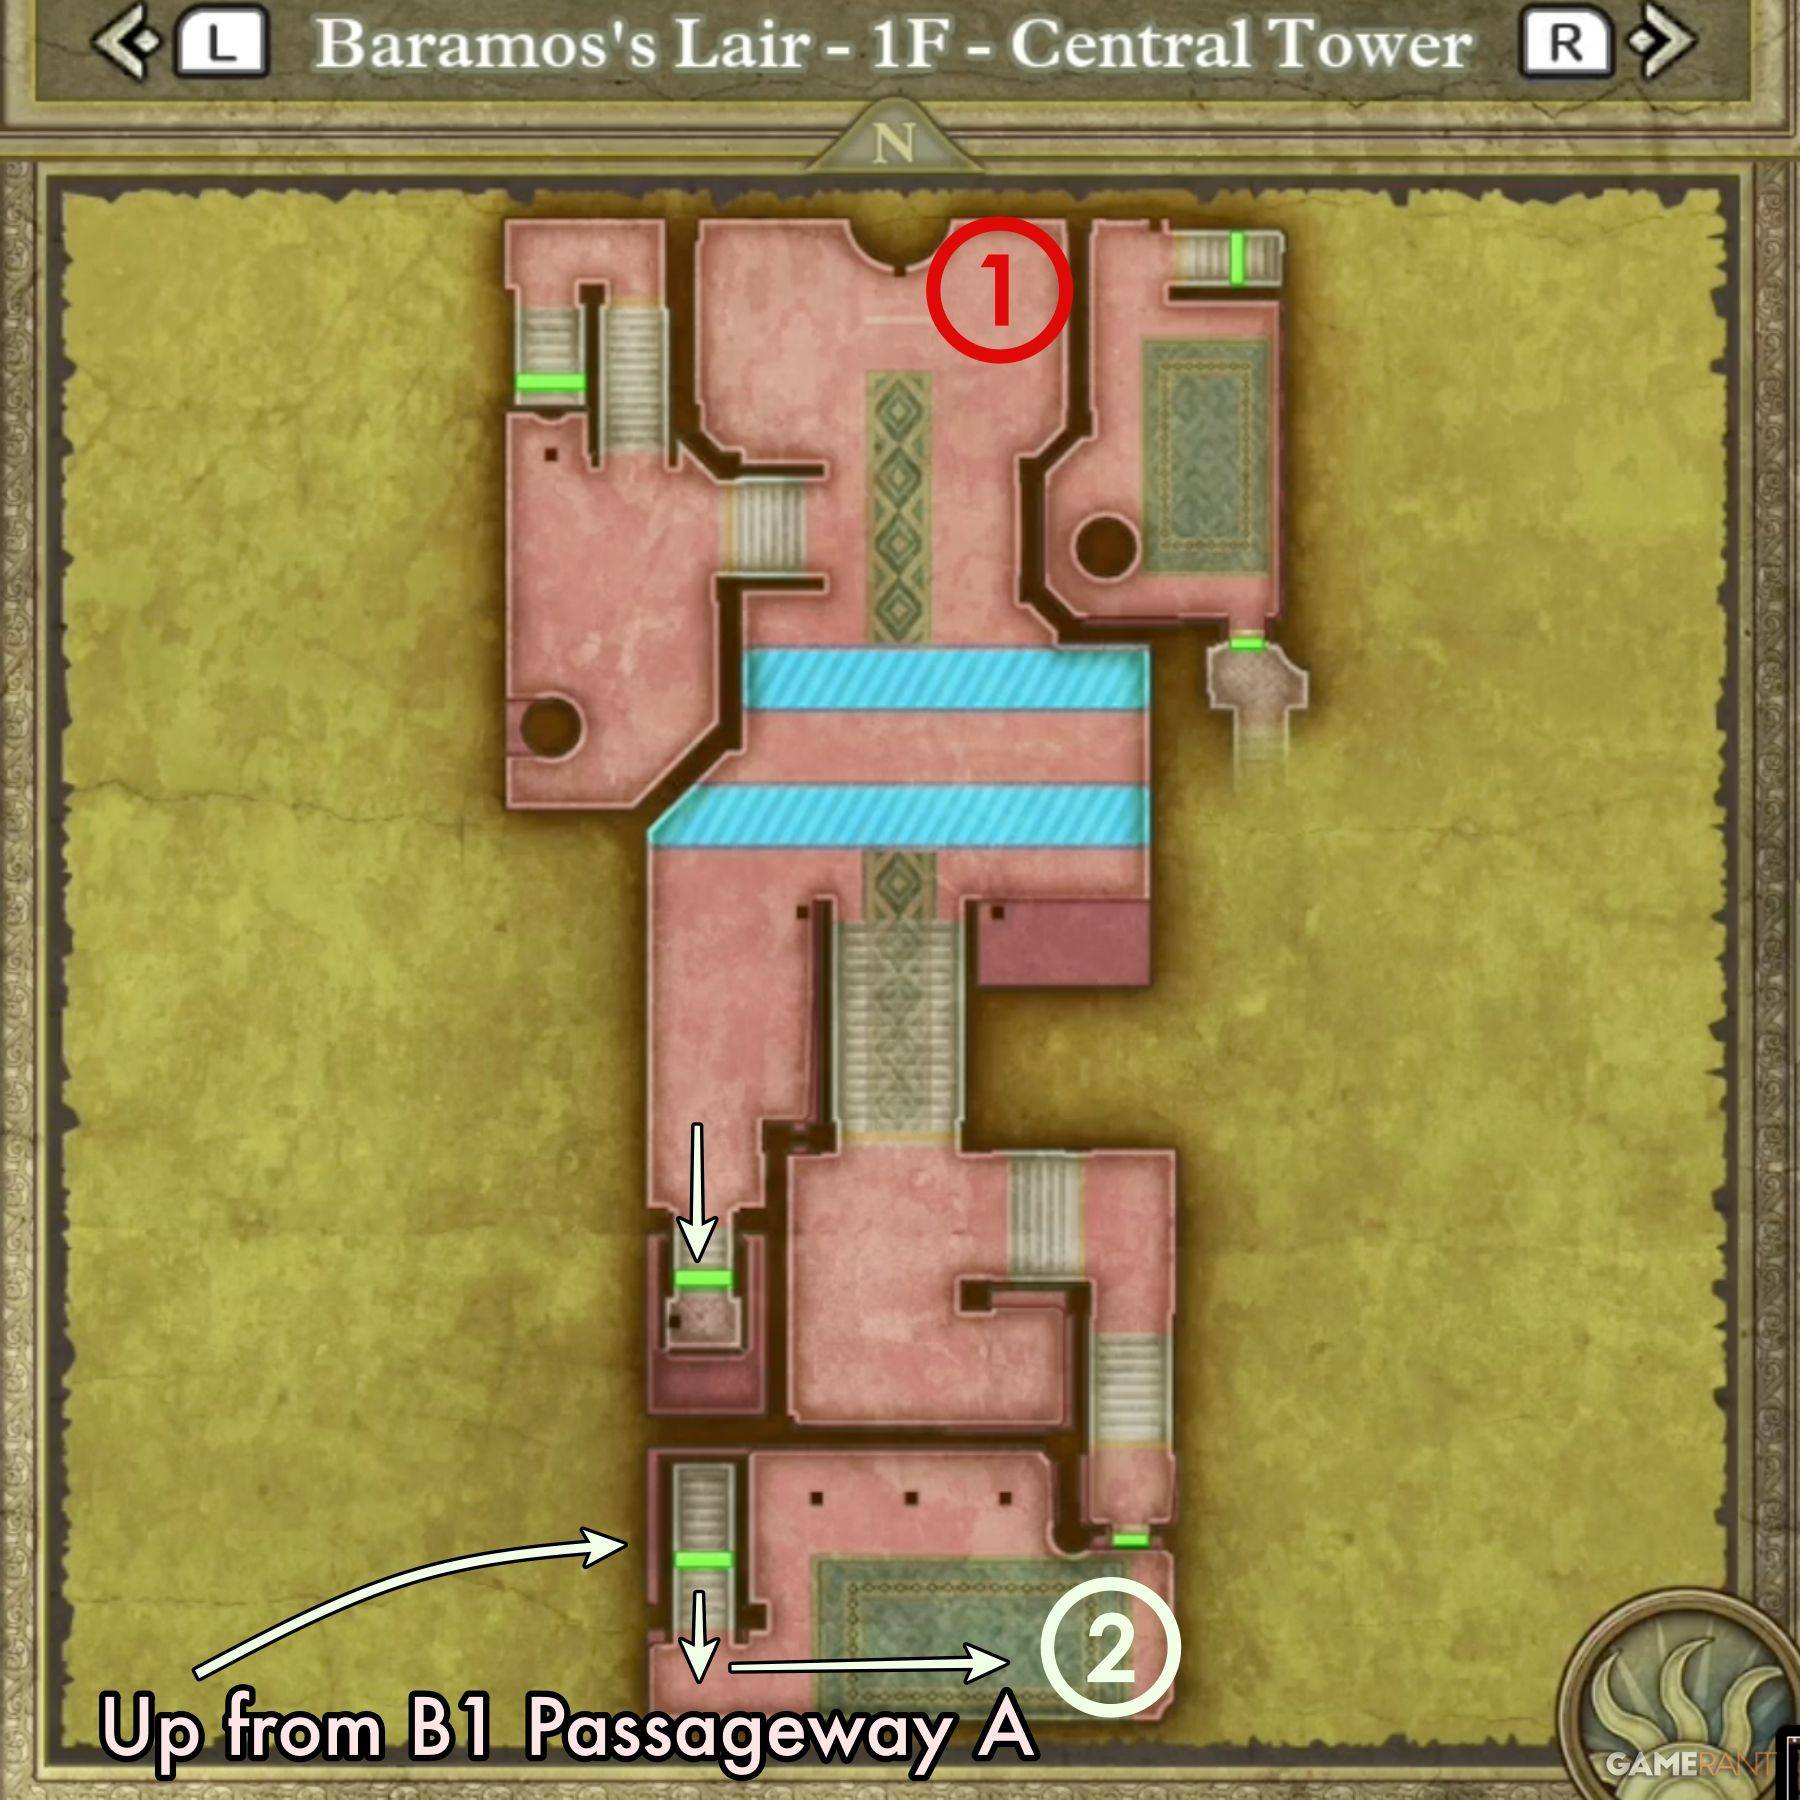
- Treasure 1: Mimic (enemy)
- Treasure 2: Dragon Mail
South-East Tower:
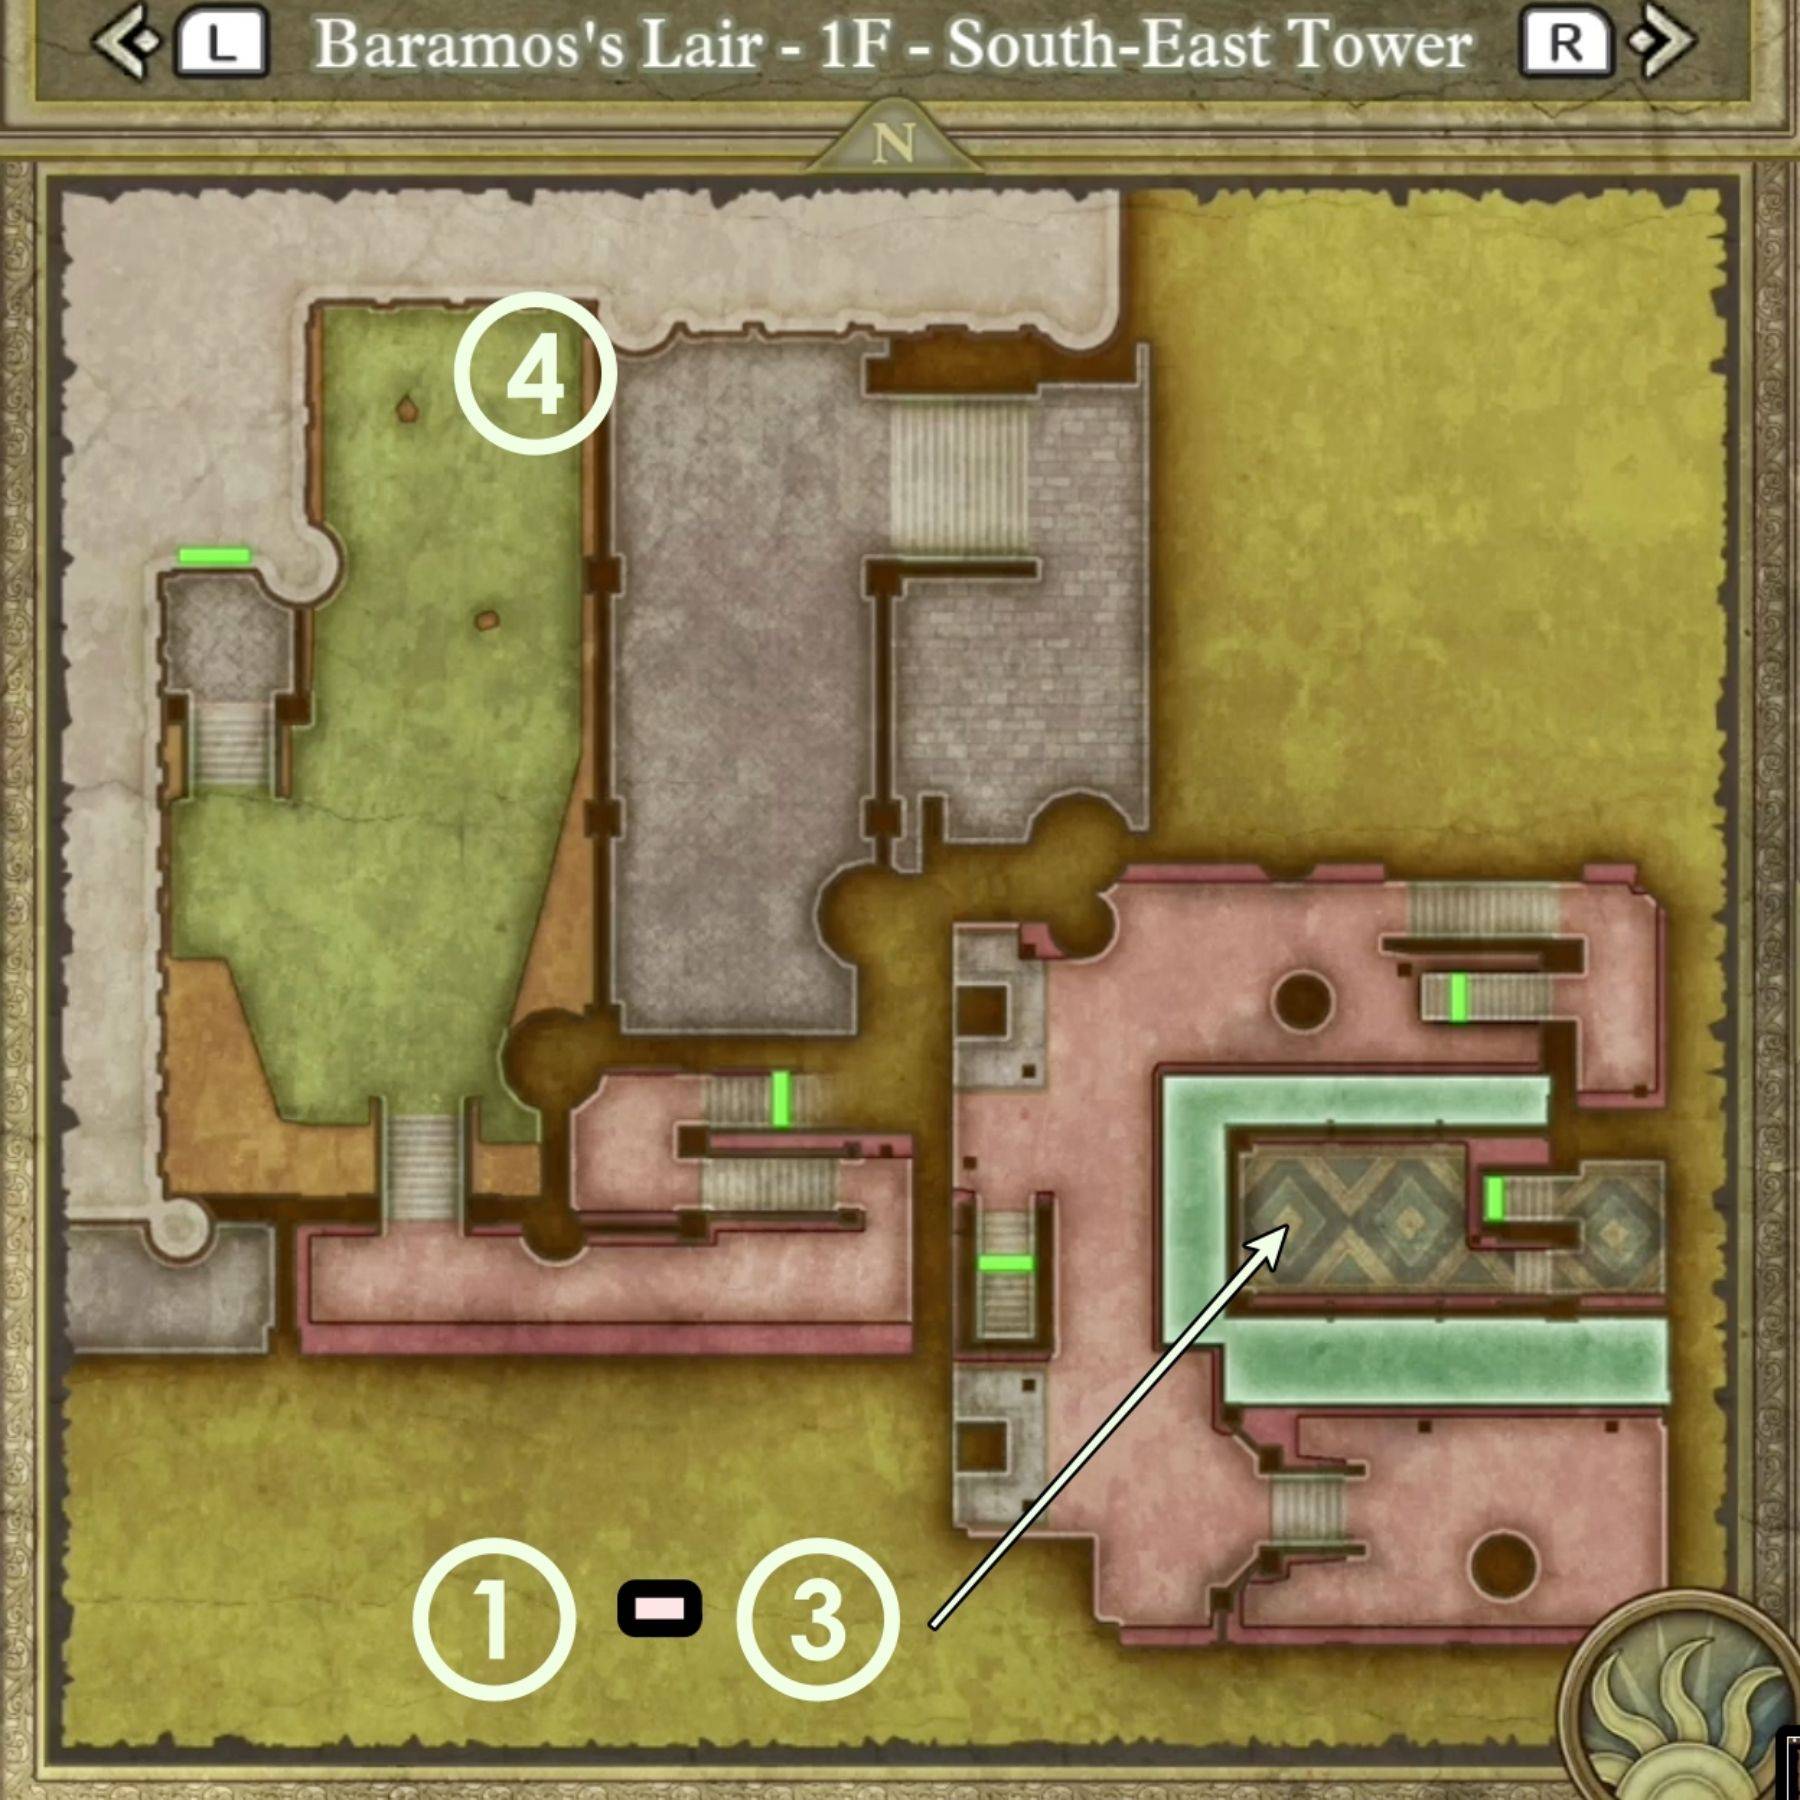
- Treasure 1 (Chest): Hapless Helm
- Treasure 2 (Chest): Sage's Elixir
- Treasure 3 (Chest): Headsman's Axe
- Treasure 4 (Chest): Zombiesbane
B1 Passageway:
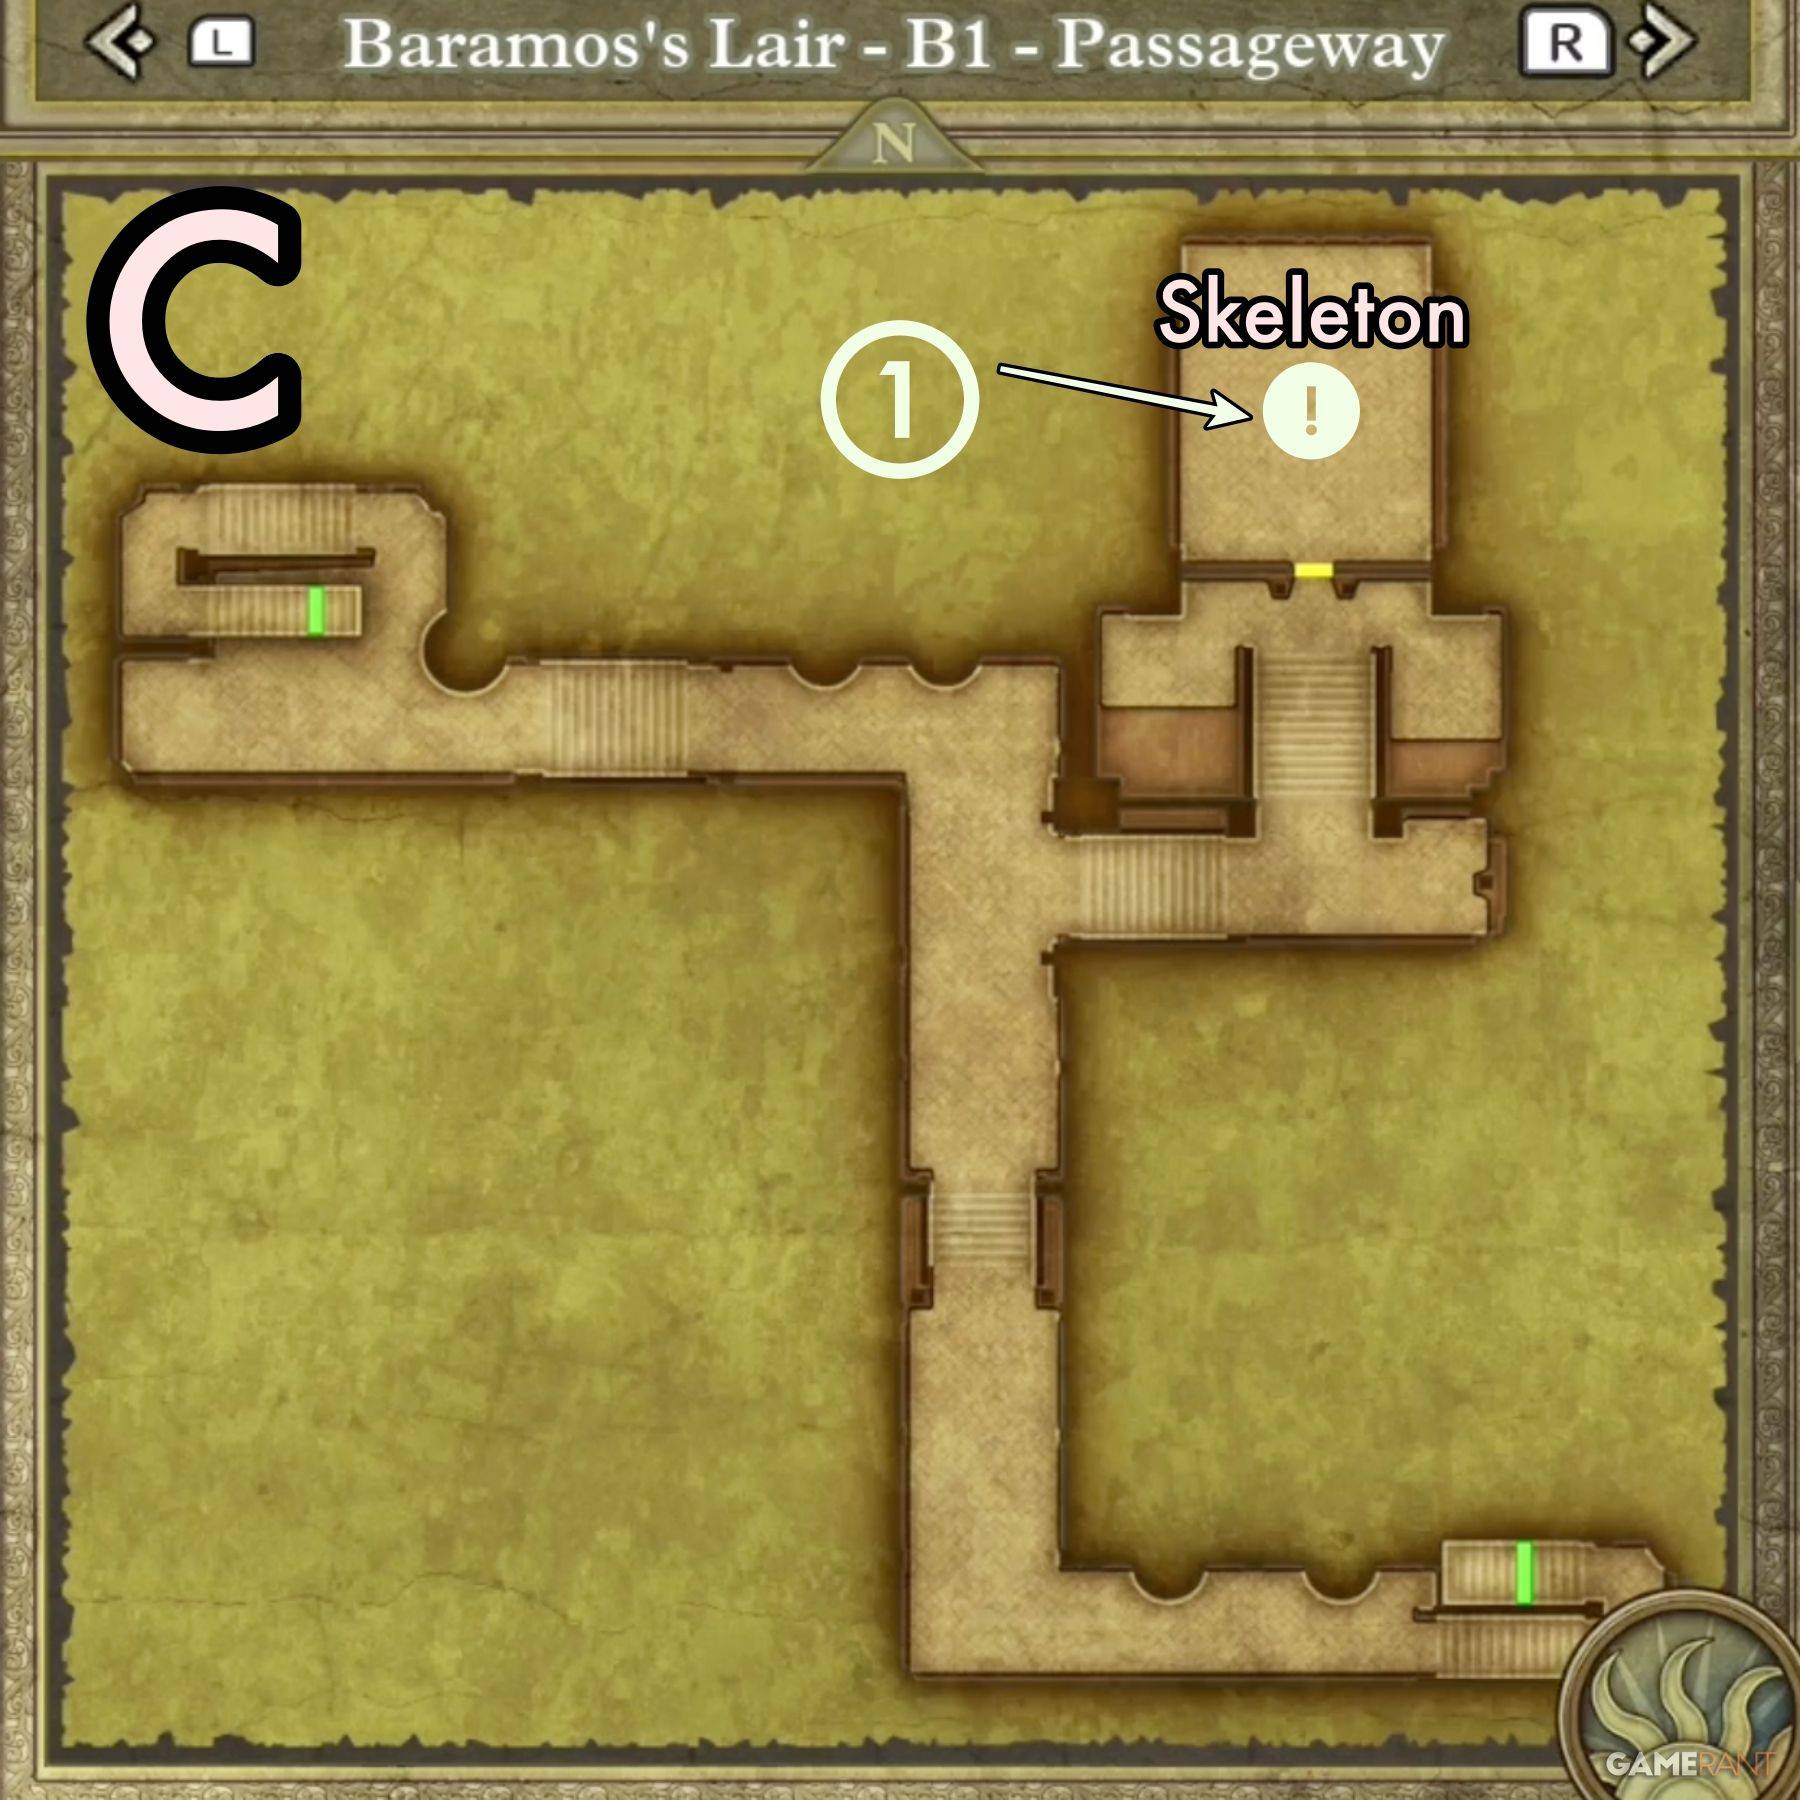
- Treasure 1 (Buried): Mini Medal
Throne Room:
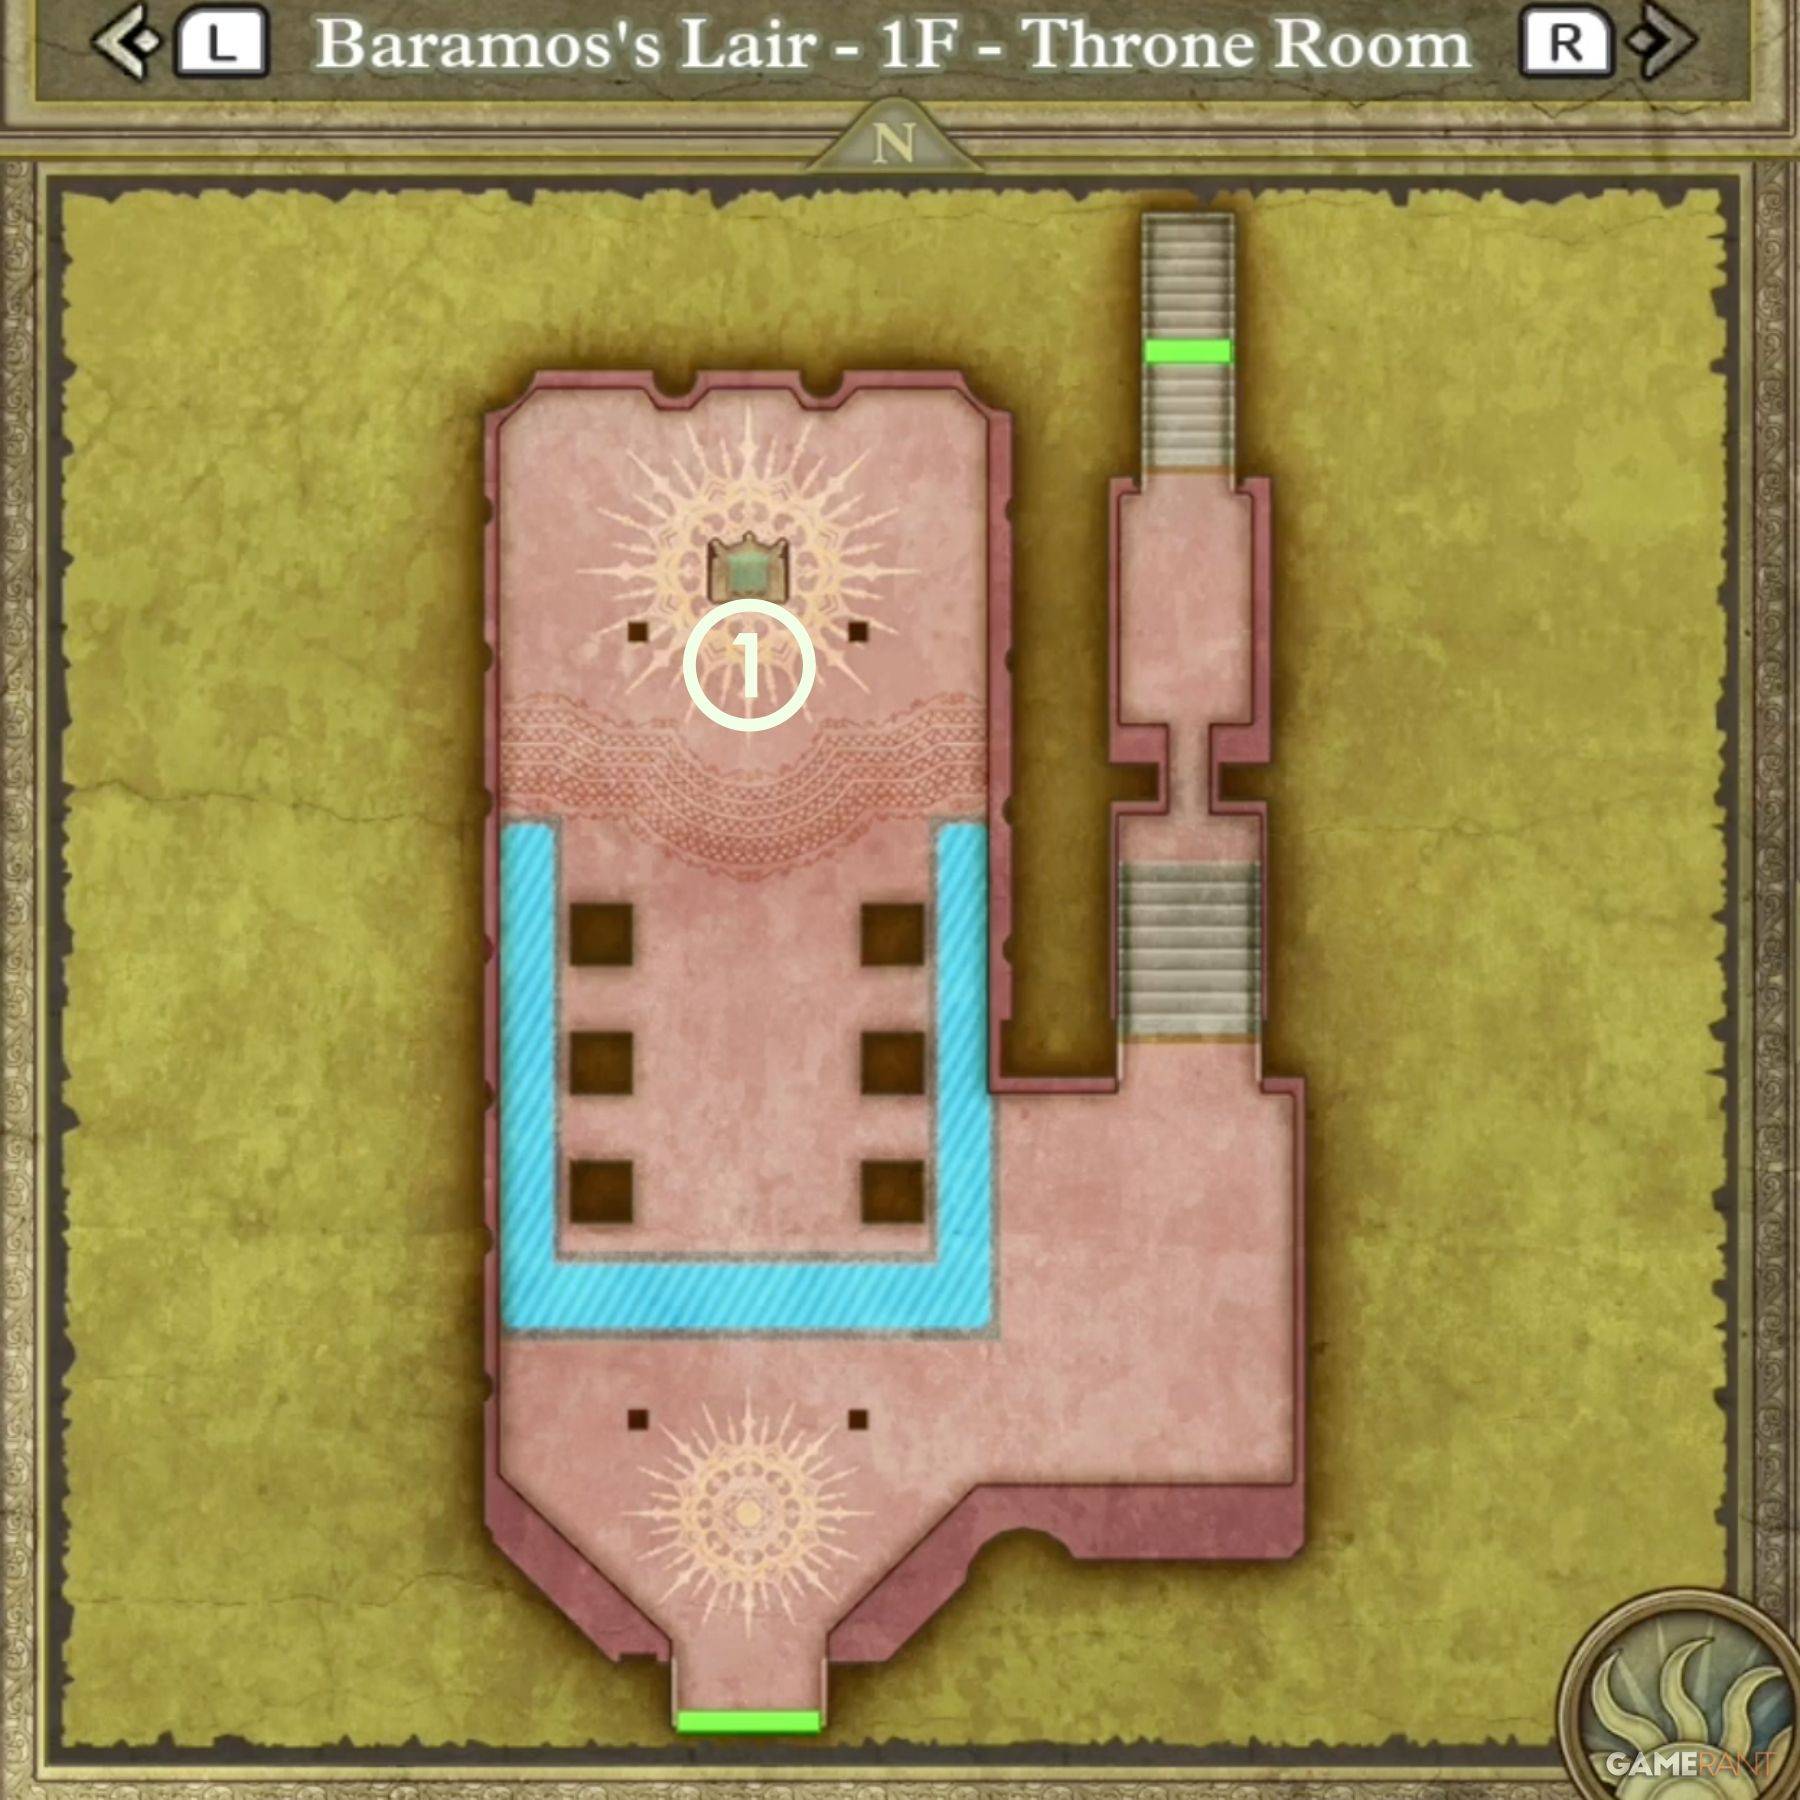
- Treasure 1 (Buried): Mini Medal
Defeating Baramos
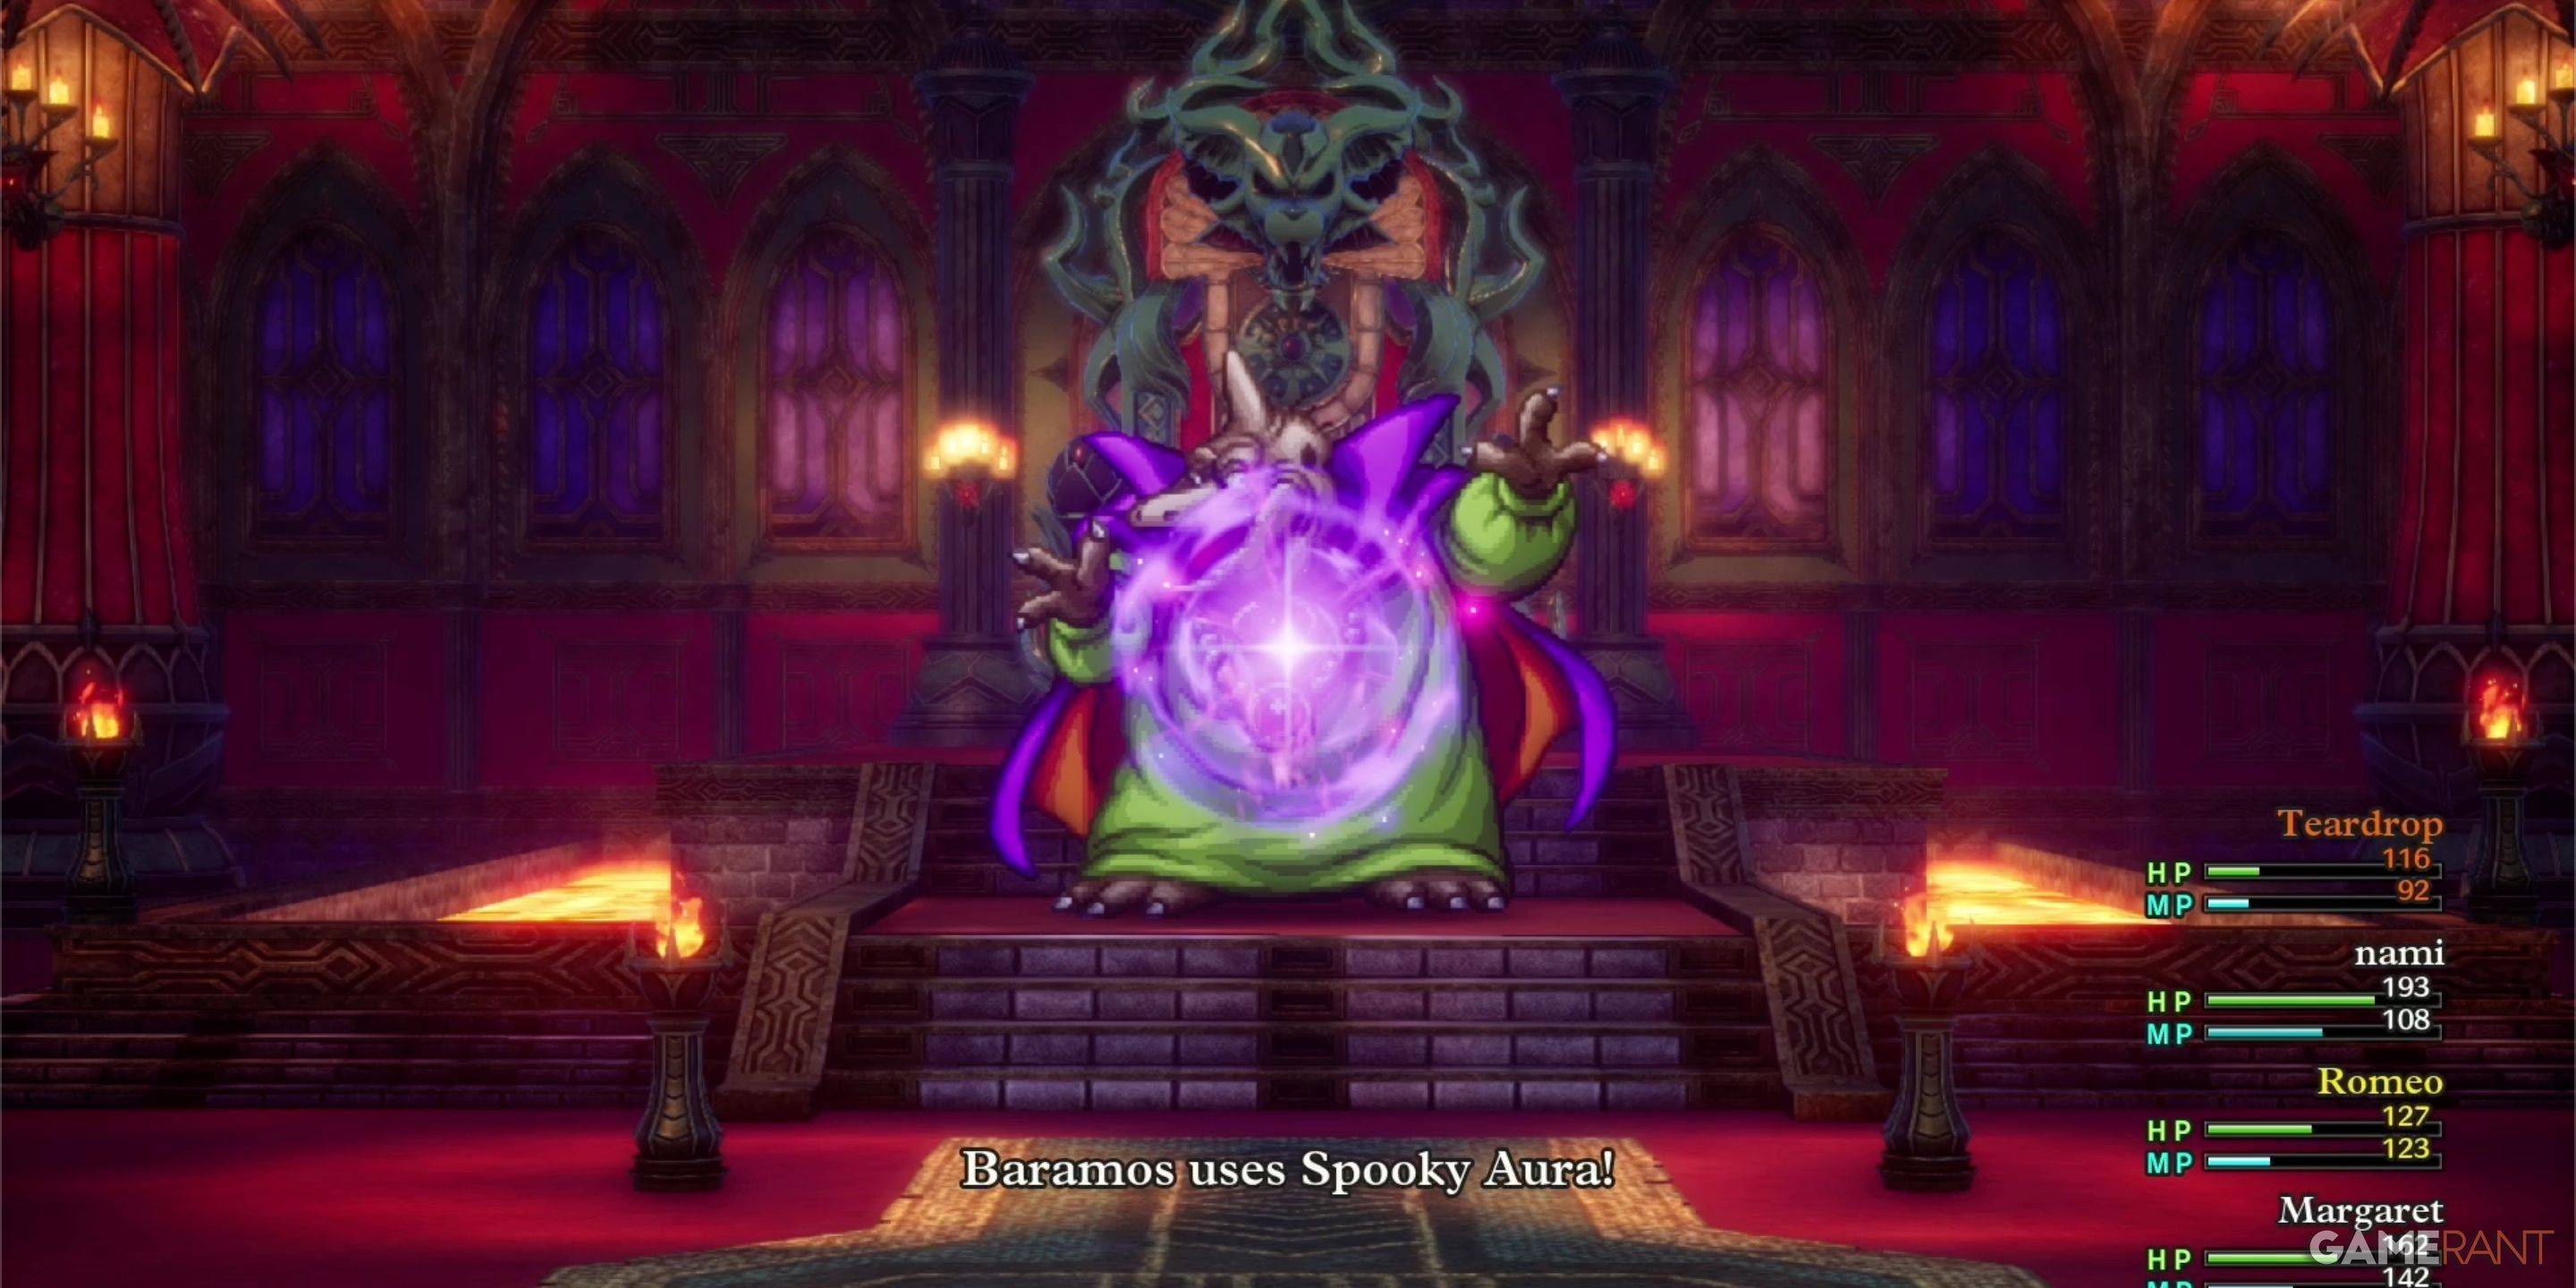
Baramos presents a significant challenge. Strategic planning and adequate party levels are crucial.
Baramos's Weaknesses:
- Crack (Ice spells)
- Whoosh (Wind spells)
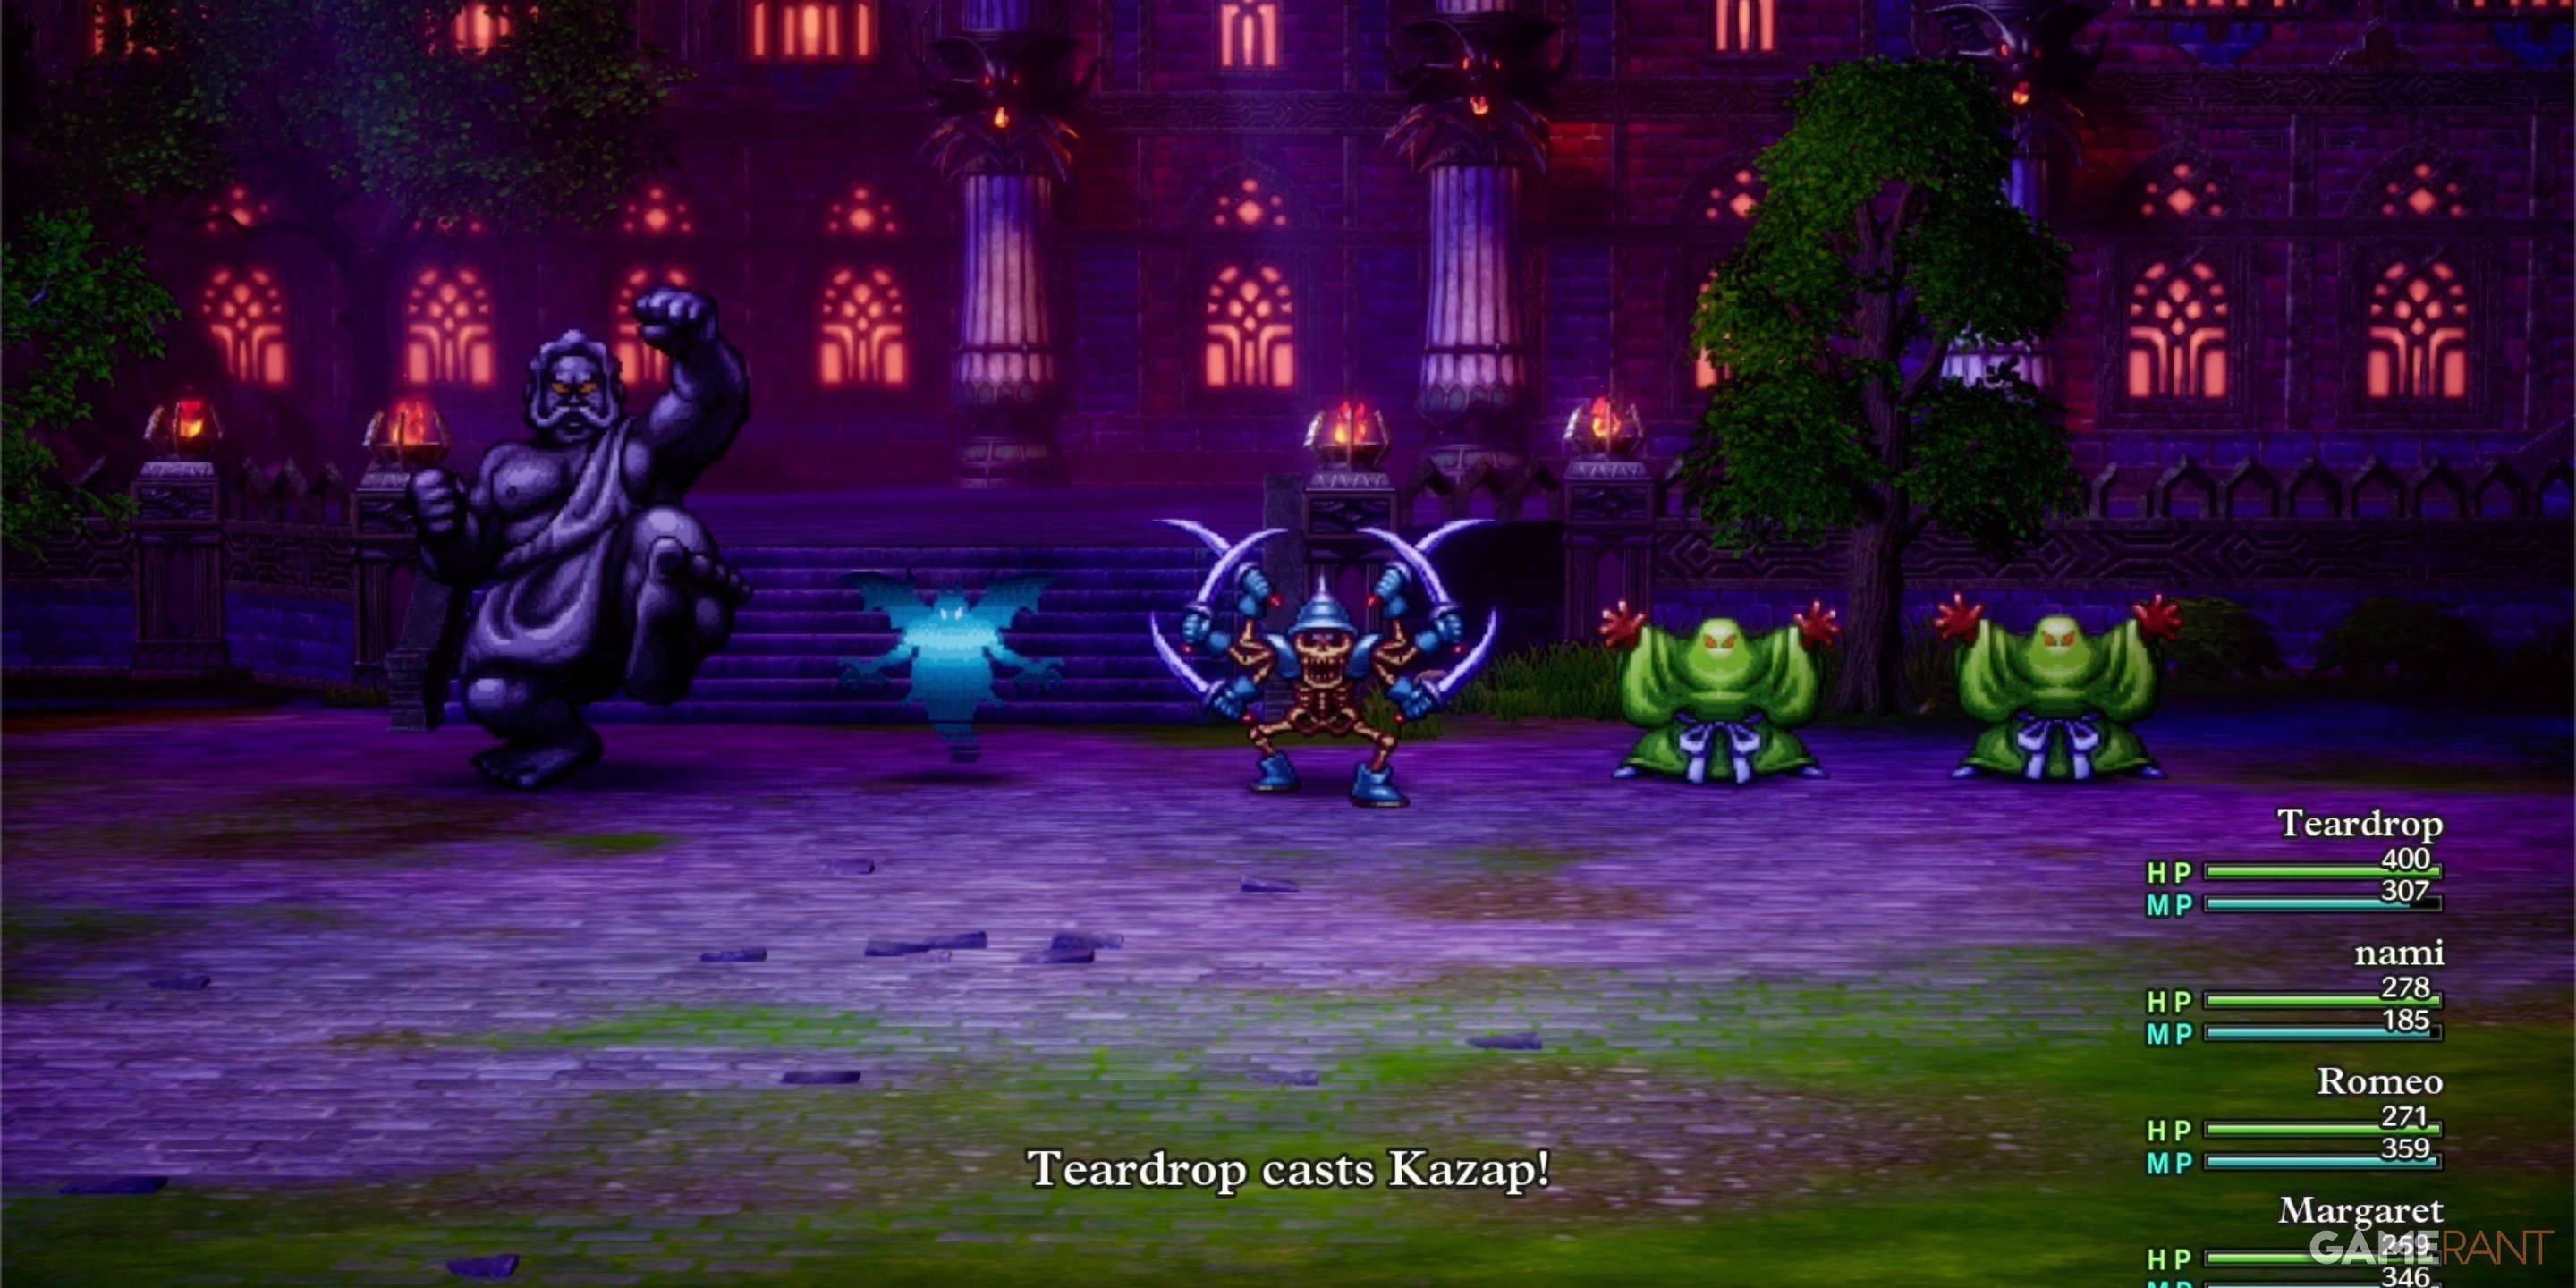
Zap spells are ineffective. Utilize high-level spells like Kacrack and Swoosh, or Gust Slash. Maintain a dedicated healer. Prioritize survival over speed.
Baramos's Lair Monsters
| Monster Name | Weakness |
|---|---|
| Armful | Zap |
| Boreal Serpent | TBD |
| Infanticore | TBD |
| Leger-De-Man | TBD |
| Living Statue | None |
| Liquid Metal Slime | None |
| Silhouette | Varies |
This comprehensive guide equips you to navigate and conquer Baramos's Lair, securing its treasures and overcoming its formidable challenges.
-
 Jan 27,25Roblox: Bike Obby Codes (January 2025) Bike Obby: Unlock Awesome Rewards with These Roblox Codes! Bike Obby, the Roblox cycling obstacle course, lets you earn in-game currency to upgrade your bike, buy boosters, and customize your ride. Mastering the various tracks requires a top-tier bike, and thankfully, these Bike Obby codes deliver
 -
 Feb 20,25Where to Preorder the Samsung Galaxy S25 and S25 Ultra Smartphones Samsung's Galaxy S25 Series: A Deep Dive into the 2025 Lineup Samsung unveiled its highly anticipated Galaxy S25 series at this year's Unpacked event. The lineup features three models: the Galaxy S25, S25+, and S25 Ultra. Preorders are open now, with shipping commencing February 7th. Samsung's web
 -
 Jan 11,25Jujutsu Kaisen Phantom Parade: Tier List Revealed This Jujutsu Kaisen Phantom Parade tier list helps free-to-play players prioritize character acquisition. Note that this ranking is subject to change with game updates. Tier List: Tier Characters S Satoru Gojo (The Strongest), Nobara Kugisaki (Girl of Steel), Yuta Okkotsu (Lend Me Your Stren
 -
 Mar 04,25The Godfeather swoops onto iOS, pre-registration open now! The Godfeather: A Pigeon-Fueled Mafia War Arrives on iOS August 15th! Pre-register now for The Godfeather: A Mafia Pigeon Saga, a roguelike puzzle-action game launching on iOS August 15th! Evade the Pidge Patrol, unleash your avian arsenal (ahem, droppings), and reclaim the neighborhood from both h