


7 Days to Die: Mastering Infested Clear Missions
Quick Links
In the zombie-infested world of 7 Days To Die, mission variety keeps the gameplay exciting. While some tasks, like buried treasure hunts, are relatively straightforward, others—like infested missions—present a significant challenge. These missions become available as you progress through the trader tiers, unlocking increasingly difficult objectives. Infested missions offer a thrilling test of survival skills, rewarding players with valuable XP, loot, and rare items. This guide details everything you need to know about tackling these perilous quests.
How To Start An Infested Clear Mission
 To begin any mission, you must visit one of the five traders in a standard map: Rekt, Jen, Bob, Hugh, and Joe. The choice of trader doesn't significantly affect the mission itself; the mission location and tier are the key factors. Higher tiers mean greater difficulty. The biome also influences enemy types and toughness. For instance, a forest mission will likely have fewer ferals than a wasteland mission.
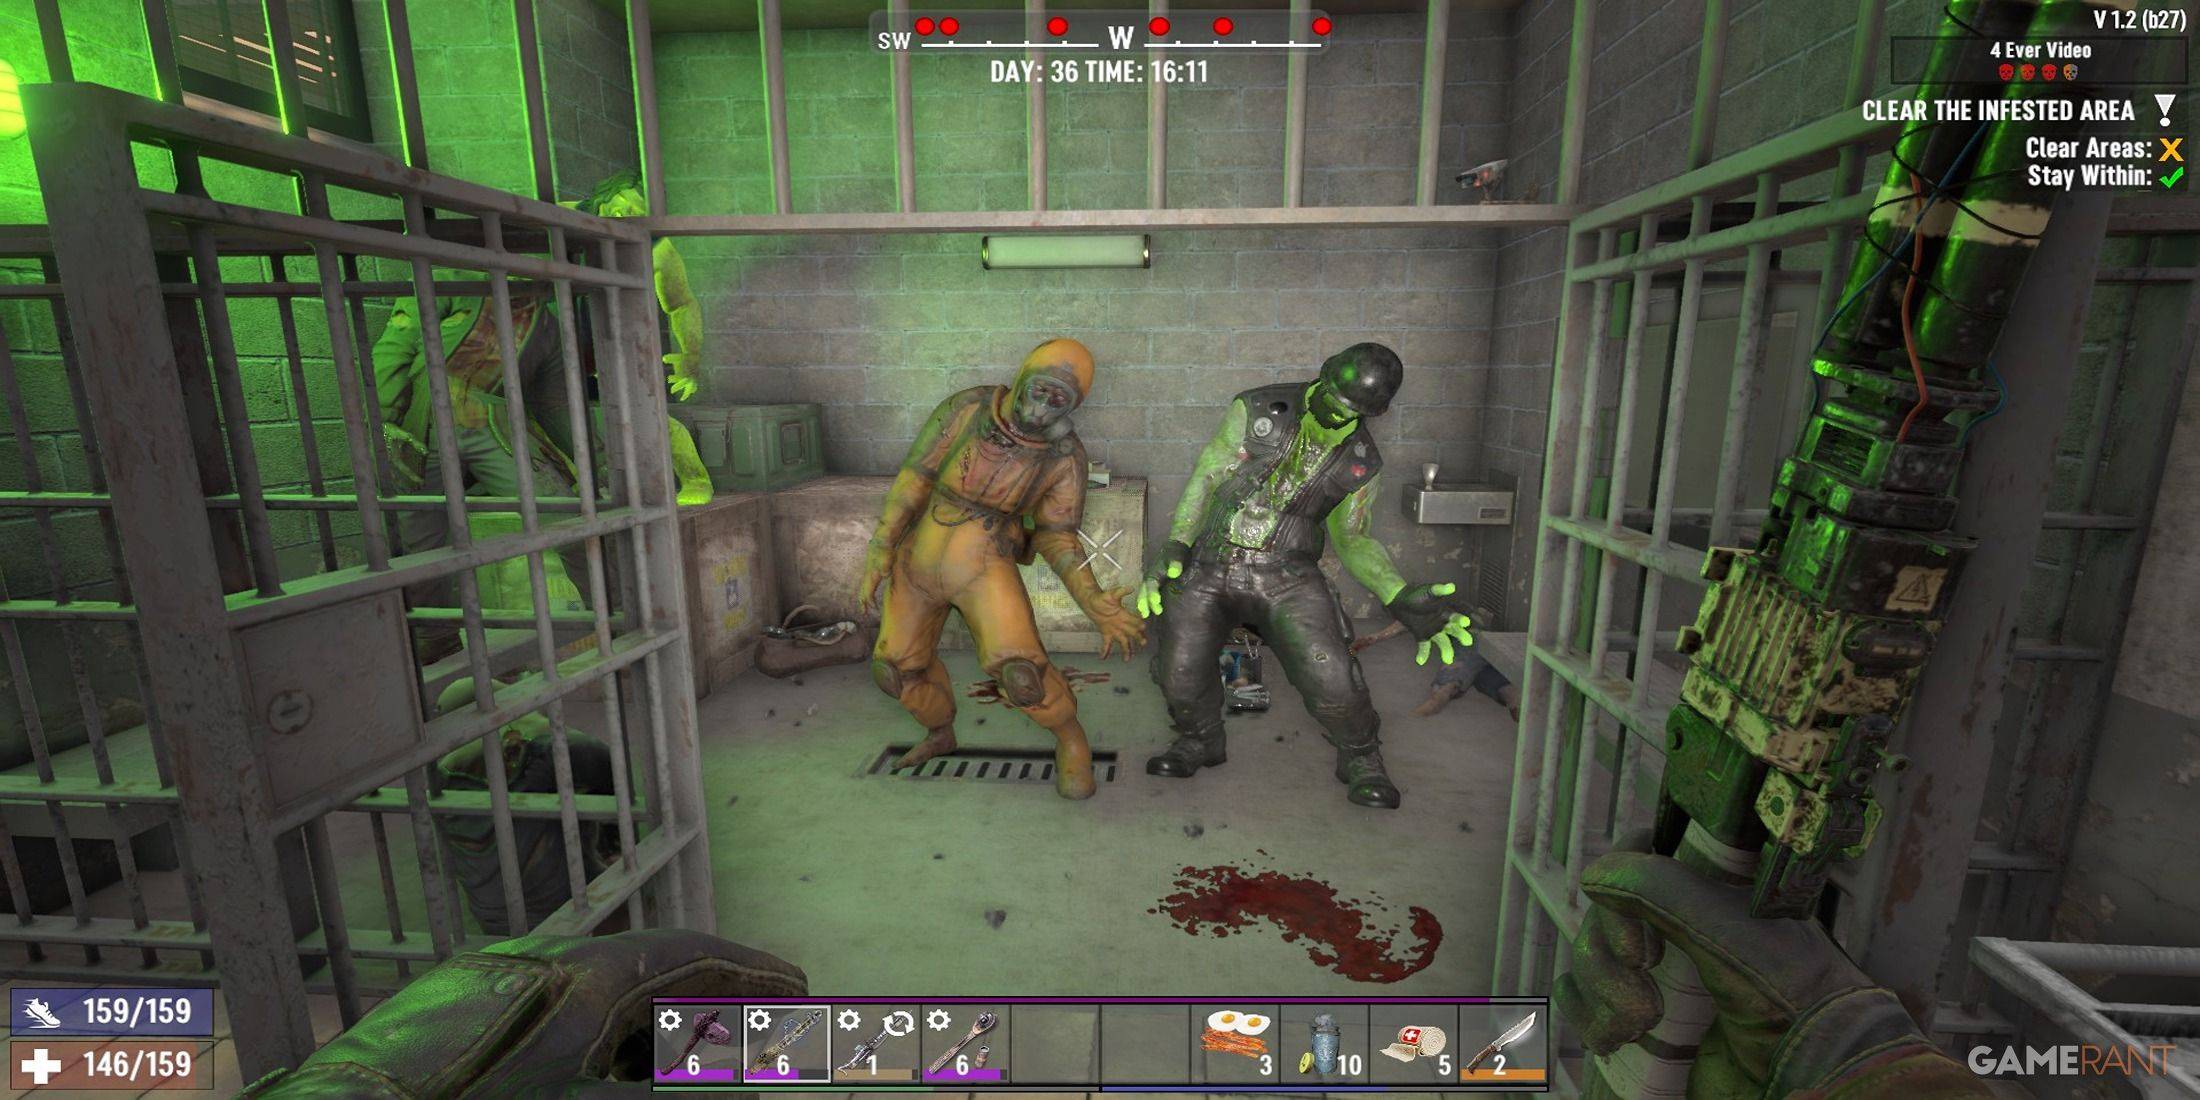
Infested missions unlock after completing 10 Tier 1 missions, granting access to Tier 2 missions. These missions are considerably harder than standard clear missions, featuring increased zombie numbers and tougher variants, including radiated zombies, cops, and ferals. Tier 6 infested missions represent the game's ultimate challenge, but by that point, you should be well-equipped to handle them. Regardless of tier, the objective remains consistent: eliminate all enemies within a designated area.
Completing An Infested Clear Mission
 Upon reaching the Point of Interest (POI), activate the mission marker to begin. Leaving the POI's vicinity will result in mission failure, as will death. Respawning will occur outside the mission area.
Each POI is designed to guide players along a specific path, incorporating trigger points that activate events such as collapsing floors or ambushes. To avoid these traps, explore alternative routes, often bypassing areas with prominent lighting (torches, lanterns, etc.).
Carrying building blocks is highly recommended. They provide a quick escape from traps or allow you to circumvent dangerous areas by scaling building sides, taking enemies by surprise.
Activated zombies are indicated by red dots on the screen; the dot size corresponds to proximity. This visual cue helps track enemy locations and avoid being overwhelmed.
As in most zombie games, headshots are the most effective tactic. However, certain zombie types possess unique abilities:
| Zombie Type | Abilities | How To Handle Them |
|---|---|---|
| Cops | Spit toxic vomit and explode when injured | Watch for the head-throw before spitting; maintain distance to avoid the blast radius. |
| Spiders | Jump across large distances | Listen for their screech before they jump; prioritize quick headshots. |
| Screamers | Scream to summon other zombies | Eliminate these first to prevent overwhelming hordes. |
| Demolition Zombies | Carry an explosive package | Avoid hitting their chest; run if the explosive begins beeping. |
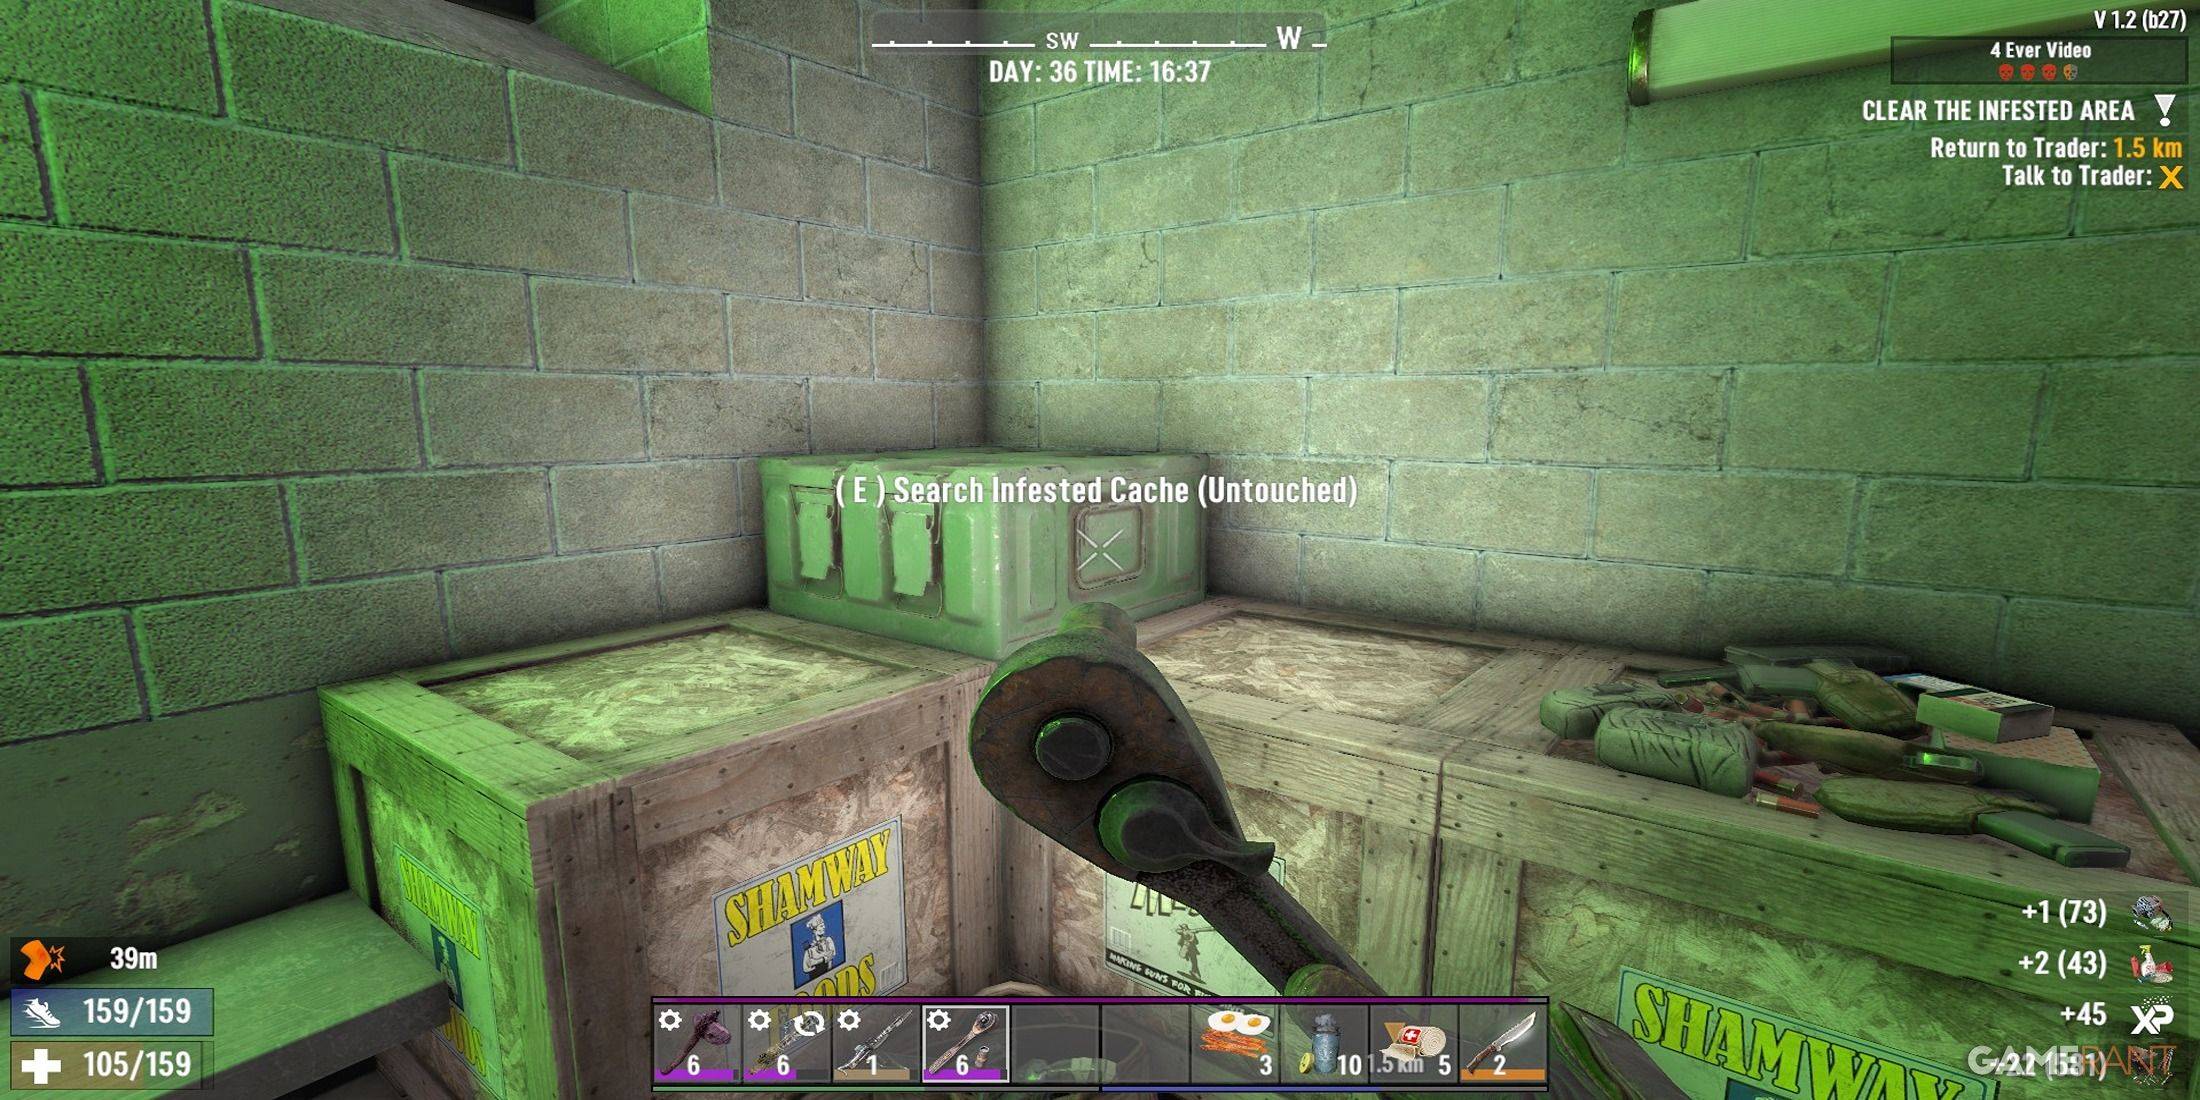
The final room typically contains high-tier loot, but also the largest concentration of zombies. Ensure you're fully healed and prepared before entering. Knowing the escape route is crucial for survival.
After clearing all zombies, the objective changes to reporting back to the trader. Collect all loot, including the valuable infested cache (usually containing ammo, magazines, and other quality items), before leaving.
Infested Clear Mission Rewards
 Upon returning to the trader, you can choose a random reward. Reward quality depends on several factors:
- Game Stage: Increases naturally with playtime.
- Loot Stage: Increases naturally, but can be boosted with skills like Lucky Looter and mods like Treasure Hunter.
- Tier Selection: Higher tiers yield better rewards.
- Skillpoint Selection: The "A Daring Adventurer" perk increases Duke rewards and allows selecting two rewards at rank 4.
Investing in "A Daring Adventurer" is highly recommended for maximizing rewards, especially valuable items like solar cells, crucibles, or legendary parts. Selling unwanted items after the mission provides additional XP (1 XP per Duke earned from the sale).
-
 Jan 27,25Roblox: Bike Obby Codes (January 2025) Bike Obby: Unlock Awesome Rewards with These Roblox Codes! Bike Obby, the Roblox cycling obstacle course, lets you earn in-game currency to upgrade your bike, buy boosters, and customize your ride. Mastering the various tracks requires a top-tier bike, and thankfully, these Bike Obby codes deliver
 -
 Feb 20,25Where to Preorder the Samsung Galaxy S25 and S25 Ultra Smartphones Samsung's Galaxy S25 Series: A Deep Dive into the 2025 Lineup Samsung unveiled its highly anticipated Galaxy S25 series at this year's Unpacked event. The lineup features three models: the Galaxy S25, S25+, and S25 Ultra. Preorders are open now, with shipping commencing February 7th. Samsung's web
 -
 Jan 11,25Jujutsu Kaisen Phantom Parade: Tier List Revealed This Jujutsu Kaisen Phantom Parade tier list helps free-to-play players prioritize character acquisition. Note that this ranking is subject to change with game updates. Tier List: Tier Characters S Satoru Gojo (The Strongest), Nobara Kugisaki (Girl of Steel), Yuta Okkotsu (Lend Me Your Stren
 -
 Mar 04,25The Godfeather swoops onto iOS, pre-registration open now! The Godfeather: A Pigeon-Fueled Mafia War Arrives on iOS August 15th! Pre-register now for The Godfeather: A Mafia Pigeon Saga, a roguelike puzzle-action game launching on iOS August 15th! Evade the Pidge Patrol, unleash your avian arsenal (ahem, droppings), and reclaim the neighborhood from both h